Bokeh on a Budget
How to Take Great Pictures with Vintage Lenses
Published 01/06/2025, last edited 23/12/2025
Contents
1 Introduction
Anyone who has spent time researching portrait photography gear has likely come across the recommendation to use a 50mm f/1.4 lens. A wide aperture “nifty fifty” is a versatile choice, offering not only creamy background blur (or bokeh, from the Japanese word boke meaning “blur” or “haze”) that brings subjects to life, but also a natural perspective that is just about sufficiently wide to be suitable for landscape photography.[1][1]: Assuming one is using a full-frame camera. When using a crop sensor format such as APS-C, the equivalent full-frame focal length is the actual focal length multiplied by the crop factor. The bokeh is also severely diminished by the crop factor. But there’s a catch: a new 50mm f/1.4 lens can cost anywhere from £400 to over £1,000. And that’s before even considering the price of a full-frame camera body, which easily adds another £1,500 or more to one’s bill.
This is a lot more than many aspiring photographers will want to spend. Fortunately, there is a way to get beautiful bokeh without breaking the bank — one that also helps one grow as a photographer in ways modern point-and-shoot simplicity never could. And not to worry, this isn’t a pitch for film photography.[2][2]: While one can often pick up a film camera for next to nothing, the ongoing costs of film and its development add up quickly, making it more expensive than digital in the long run. On top of that, the delayed feedback — waiting days or weeks to see one’s results — slows down the learning process, making it harder to improve quickly. With digital, one can review one’s shots instantly and experiment freely without having to worry that each shot might cost up to £1.
That’s where vintage lenses come in. These can be adapted to modern full-frame mirrorless cameras, striking a sweet spot between affordability and convenience without any significant compromise of image quality. In addition, vintage lenses often bring a unique character to pictures, something modern lenses often lack in their clinical sharpness and precision. It should be noted, however, that manual lenses are a poor choice if one plans on capturing fast moving wildlife[3][3]: Or any other kinds of subjects that aren’t going to patiently wait for the photographer to nail focus!! In this article, I’ll share lessons learned from my journey into manual photography.
2 Acquiring a vintage lens
There are many good options when it comes to choosing a vintage lens. Tbl. 1 lists a few lenses about which good things have been written online, in order of increasing focal length, but is by no means a comprehensive list. Many of these lenses were updated over time, and different versions of the same lens can have vastly different optical qualities. Before buying a lens, it is worth reading up on it online so one knows what to look out for.[4][4]: Detailed reviews of most manual lenses can be found on phillipreeve.net.
| Lens | Mount | Price |
|---|---|---|
| Canon FD 28mm f/2.8 | Canon FD | $ |
| S-M-C TAKUMAR 35mm f/2 | M42 | $$ |
| S-M-C TAKUMAR 35mm f/3.5 | M42 | $ |
| Carl Zeiss Jena 35mm f/2.4 | M42 | $ |
| Zeiss C/Y 35mm f/2.8 | C/Y | $$ |
| Konica Hexanon 40mm f/1.8 | Konica AR | $ |
| Minolta Rokkor MD 50mm f/1.2 | Minolta MD | $$ |
| S-M-C TAKUMAR 50mm f/1.4 | M42 | $ |
| Canon FD 50mm f/1.4 SSC | Canon FD | $ |
| Minolta Rokkor 50mm f/1.7 | Minolta MD | $ |
| Carl Zeiss Planar 50mm f/1.7 | C/Y | $ |
| Yashica ML 55mm f/1.2 | C/Y | $$$ |
| Helios 44 58mm f/2 | M42 | $ |
| Nikon Noct-NIKKOR 58mm f/1.2 | Nikon F-Mount | $$$$$$$$ |
| Vivitar Series 1 90mm f/2.5 Macro | various | $ |
| Tamron Adaptall 90mm f/2.5 Macro | various | $ |
| S-M-C TAKUMAR 135mm f/2.5 | M42 | $$ |
| Canon FD 125mm f/3.5 | Canon FD | $ |
| Canon FD 200mm f/2.8 | Canon FD | $$ |
| Canon FD 300mm f/4 L | Canon FD | $$ |
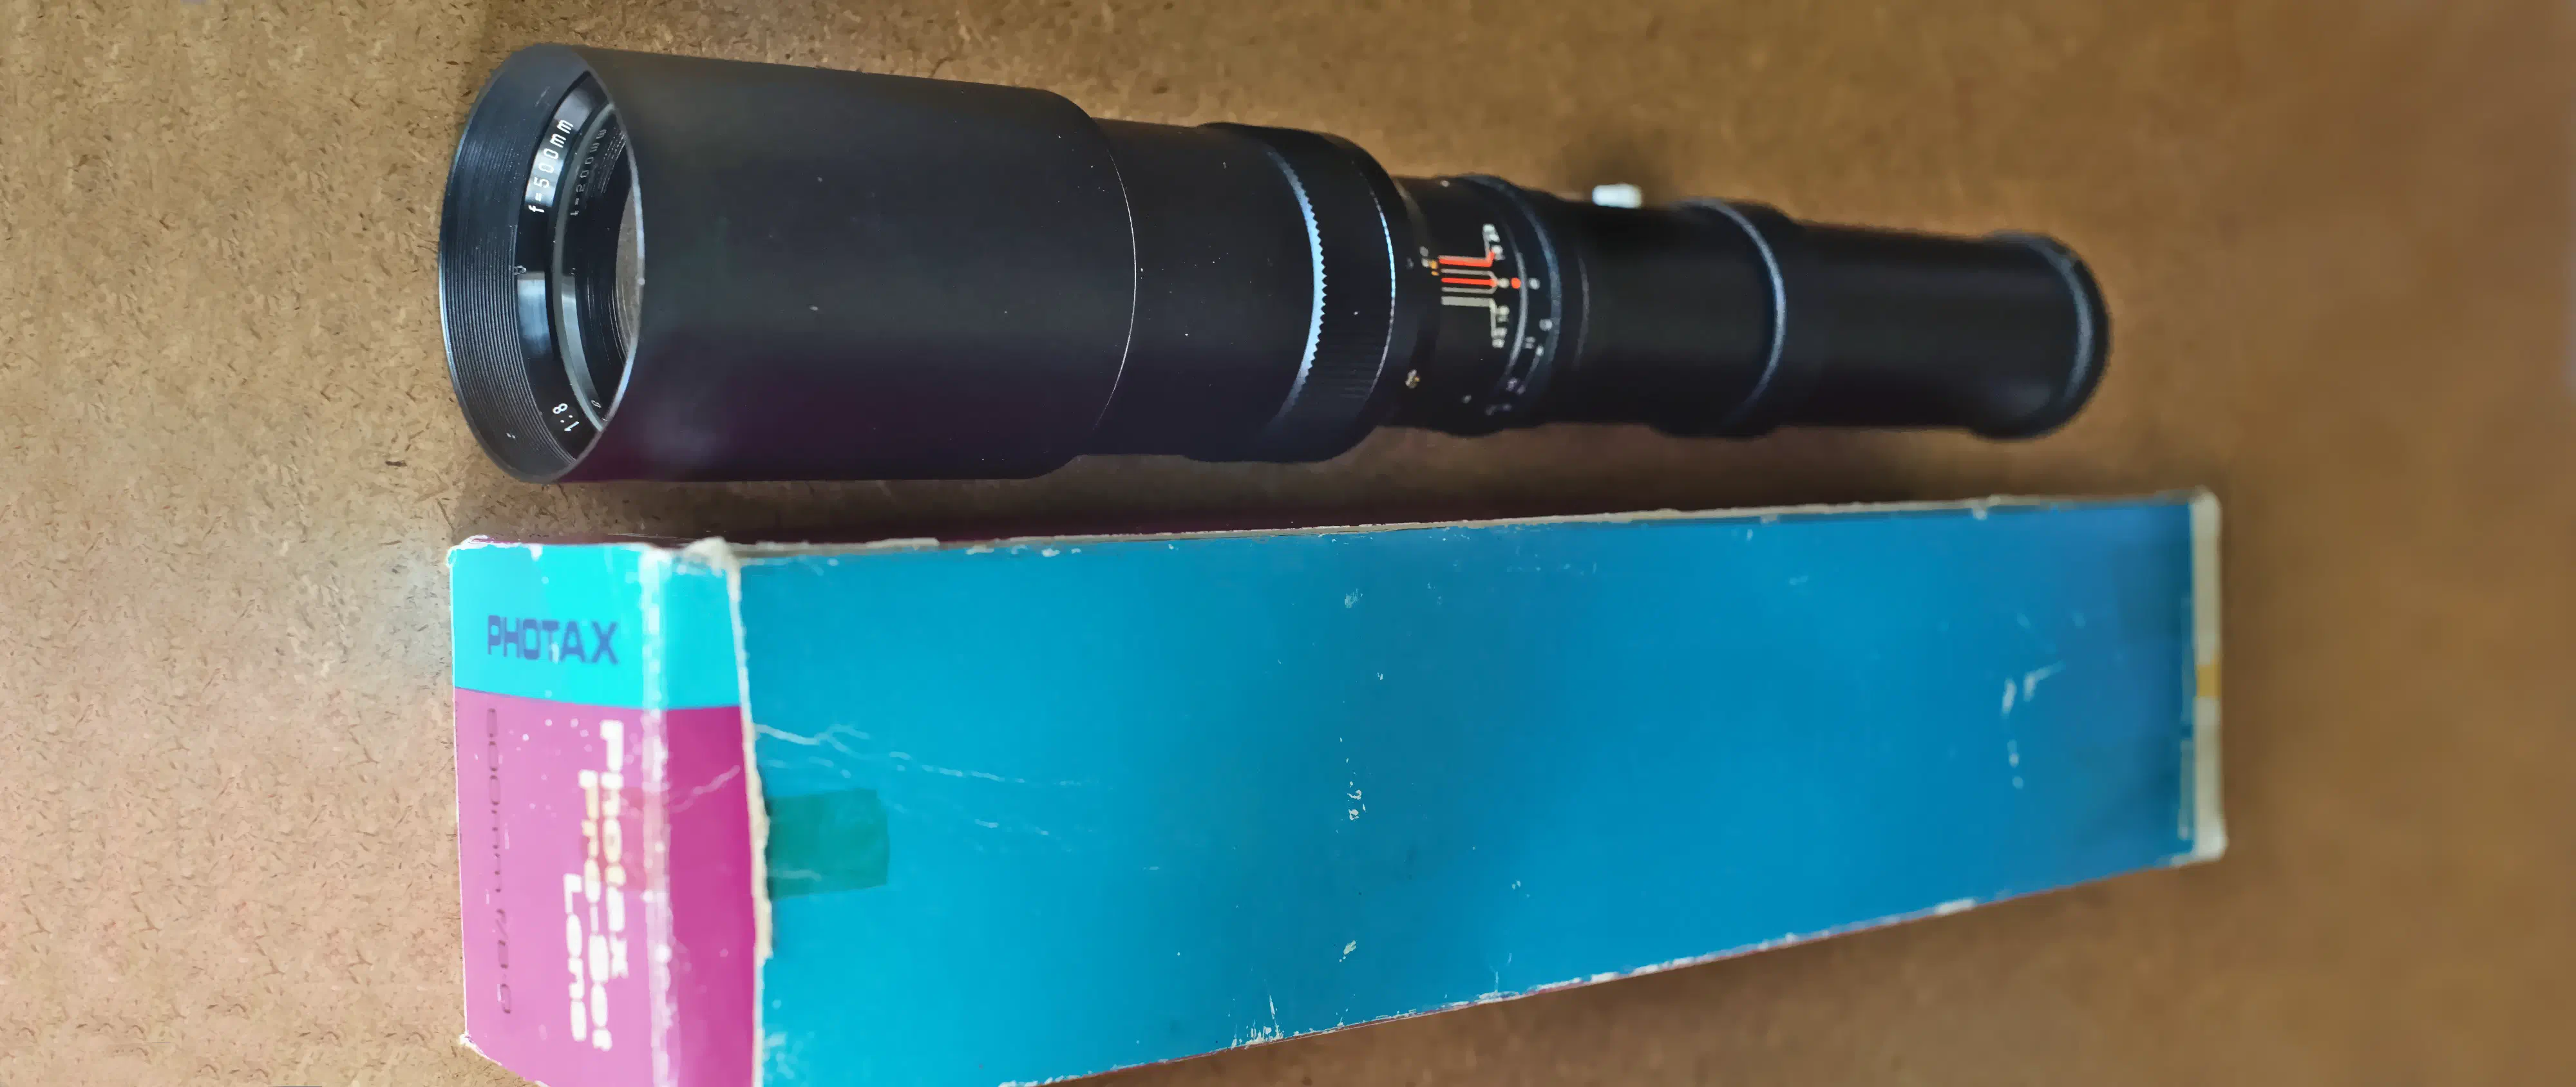
Vintage lenses can be bought on eBay or on other online platforms, but for true bargain, it is recommended to look for old film cameras and lenses on flea markets and car boot sales (or garage sales, for any American readers). Where the lens of interest comes with a film camera, the camera body can be given away to a film photographer. I bought the 500mm f/8 lens in Fig. 2 on a car boot sale for £5. A lot of vintage lenses have poor optical properties, but when the lens only cost £5, the disappointment is easy to accept.
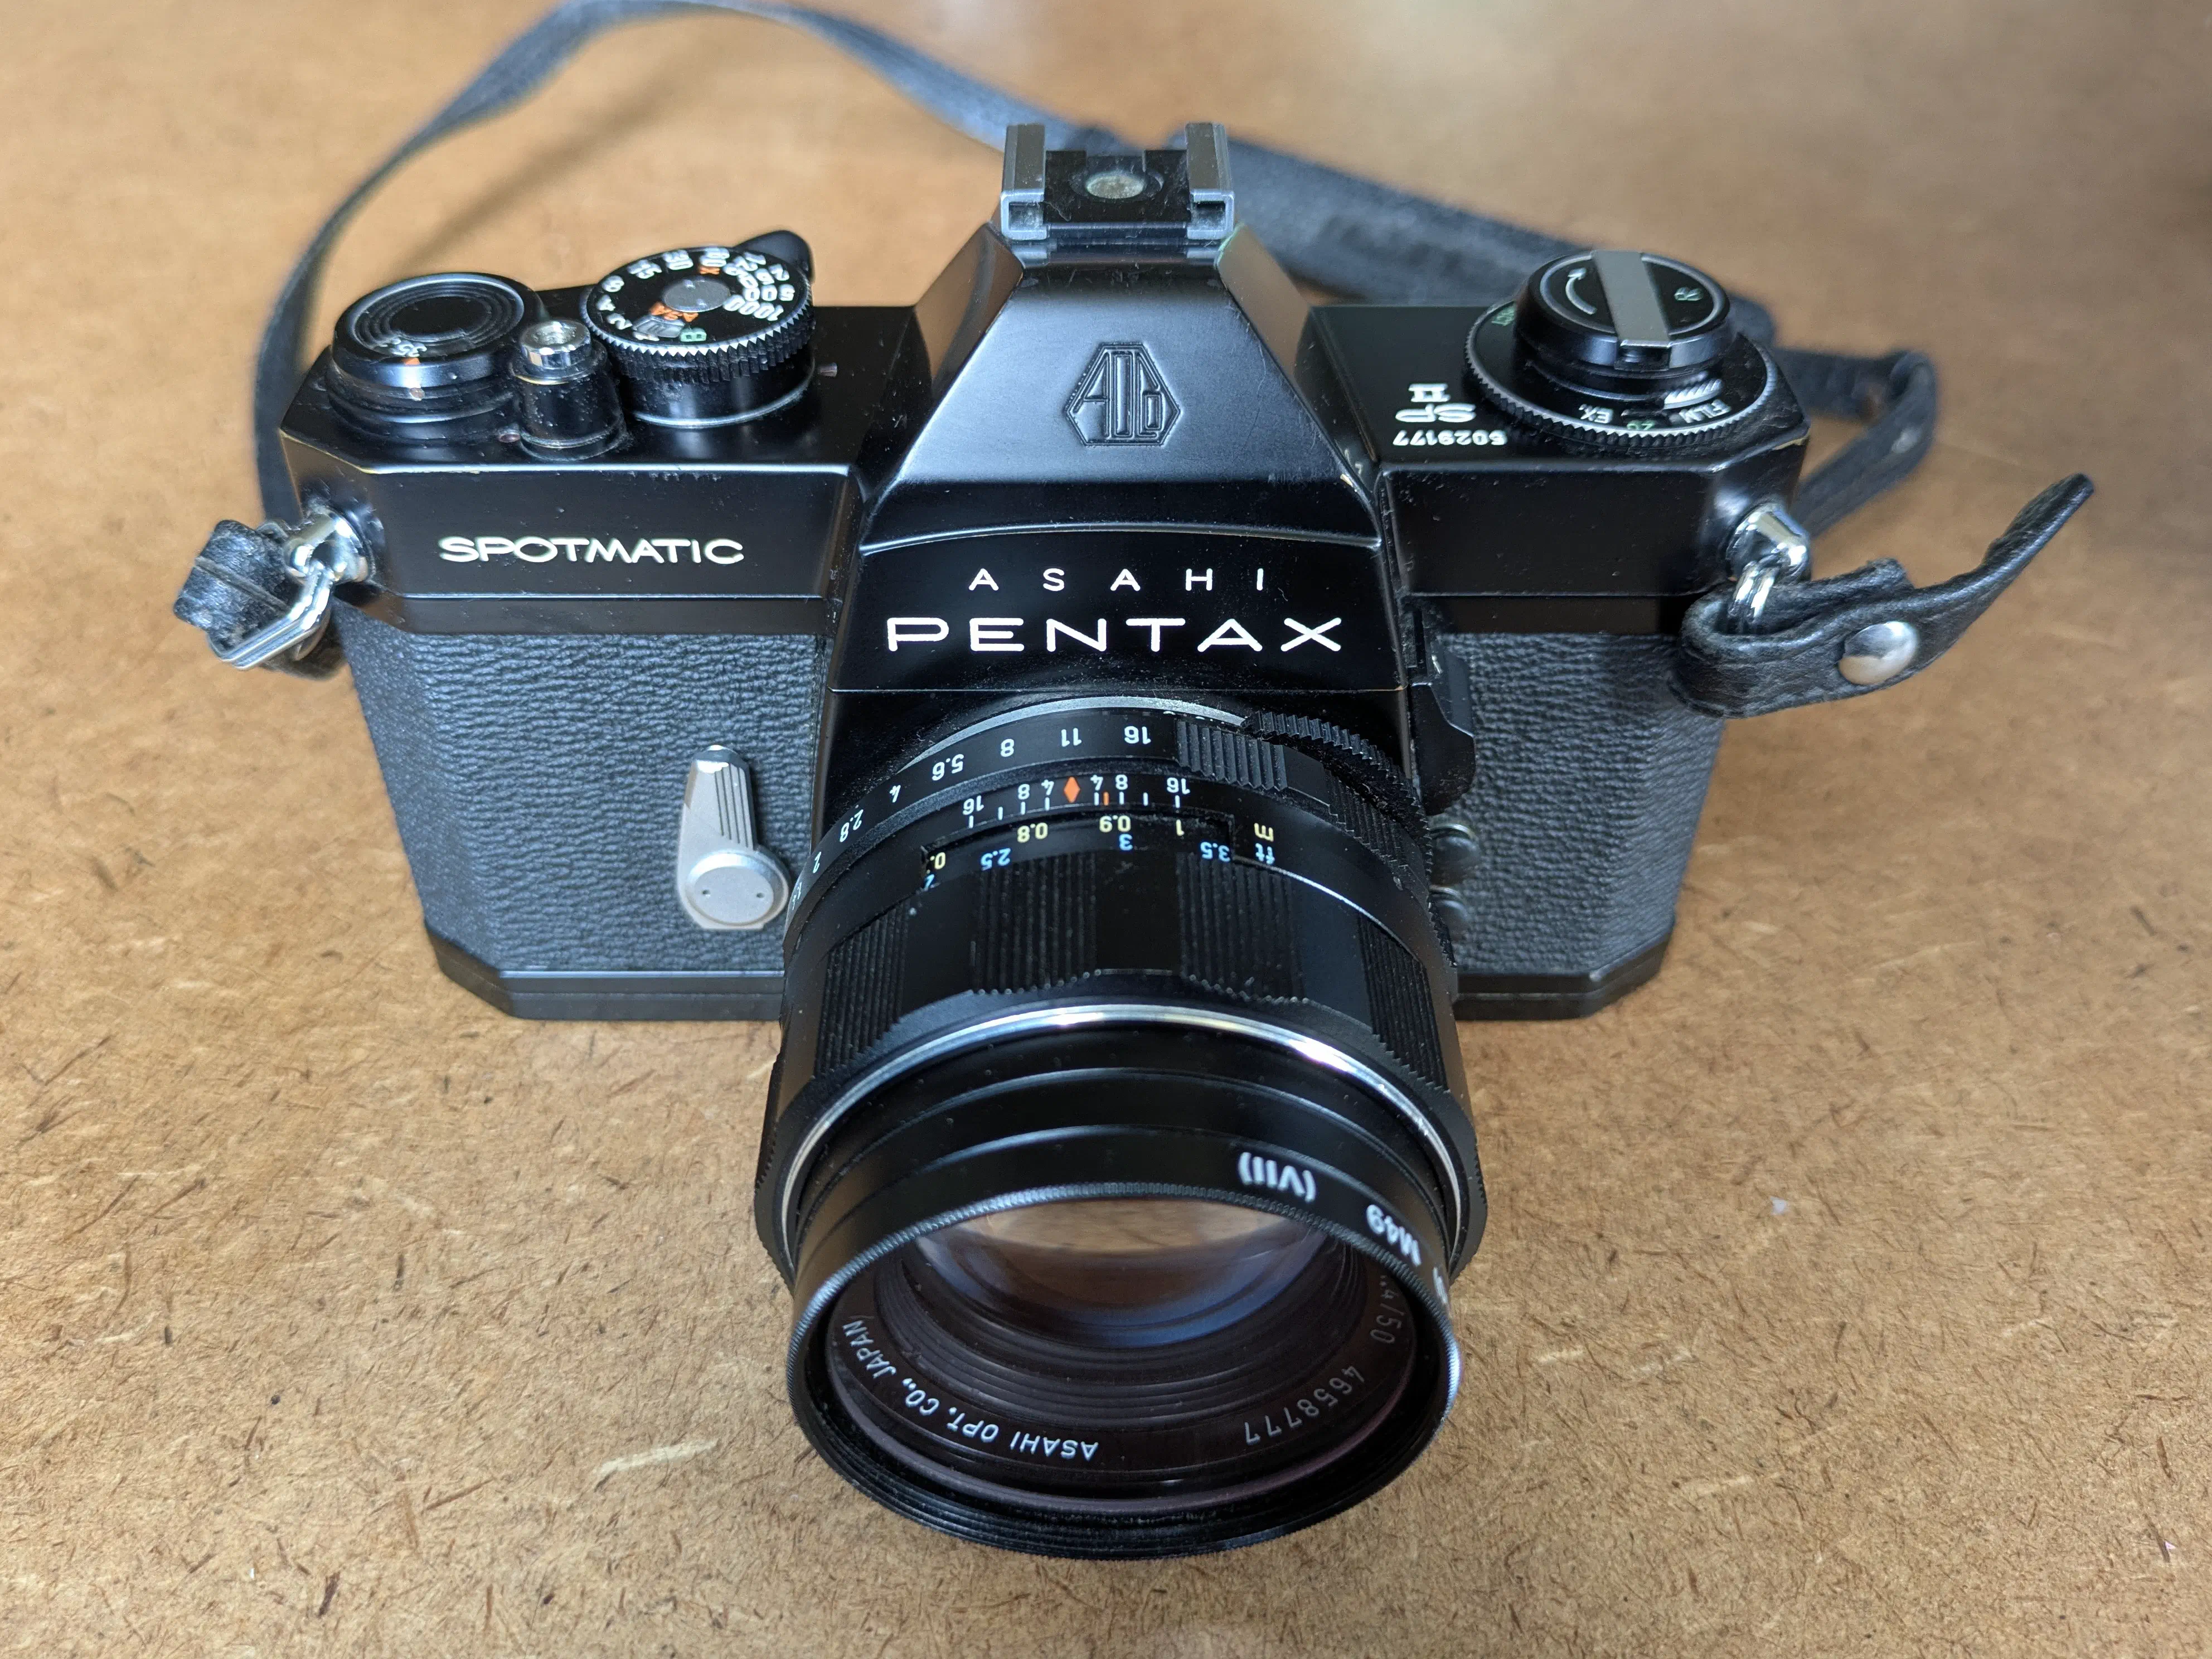
I inherited the Asahi Pentax Spotmatic camera in Fig. 1 from my grandfather. He travelled many continents with this camera, and took countless pictures with it. It came with a very nice Asahi Super-Multi-Coated TAKUMAR 50mm f/1.4 lens. The first iteration of this lens was released in the 1960s, but the 7 element Super-Multi-Coated version is a later model from the early 1970s. This lens has earned something of a legendary status in the vintage lens community, due to its sharpness[5][5]: While the centre sharpness is indeed impressive at any aperture, the corner sharpness at apertures below f/4 probably cannot compete with modern lenses., dreamy bokeh, and radioactivity[6][6]: The 7 element version was made with a thoriated glass element in the rear. Thorium increases the refractive index of the glass. Measuring the radioactivity of my copy with a Geiger counter, it is only about 20 times background radiation, and drops quicly as the Geiger counter is moved away from the rear of the lens. At this level of radioactivity even continuous exposure is very unlikely to cause adverse health effects.. According to various online reviews, this lens is prone to flare, though perhaps this is primarily a problem with the earlier 8 element version, as I never noticed this.
The lens also came with a Hama HTMC SKY1B filter, which provides excellent protection for the lens. The lens recently fell onto some rocks because one of my quick release strap connectors came apart[7][7]: I do not recommend buying these. A pair of small carabiners should provide a much more secure attachment., but luckily the only visible damage was a small dent in the rim of the filter, the lens remaining mostly unscathed.
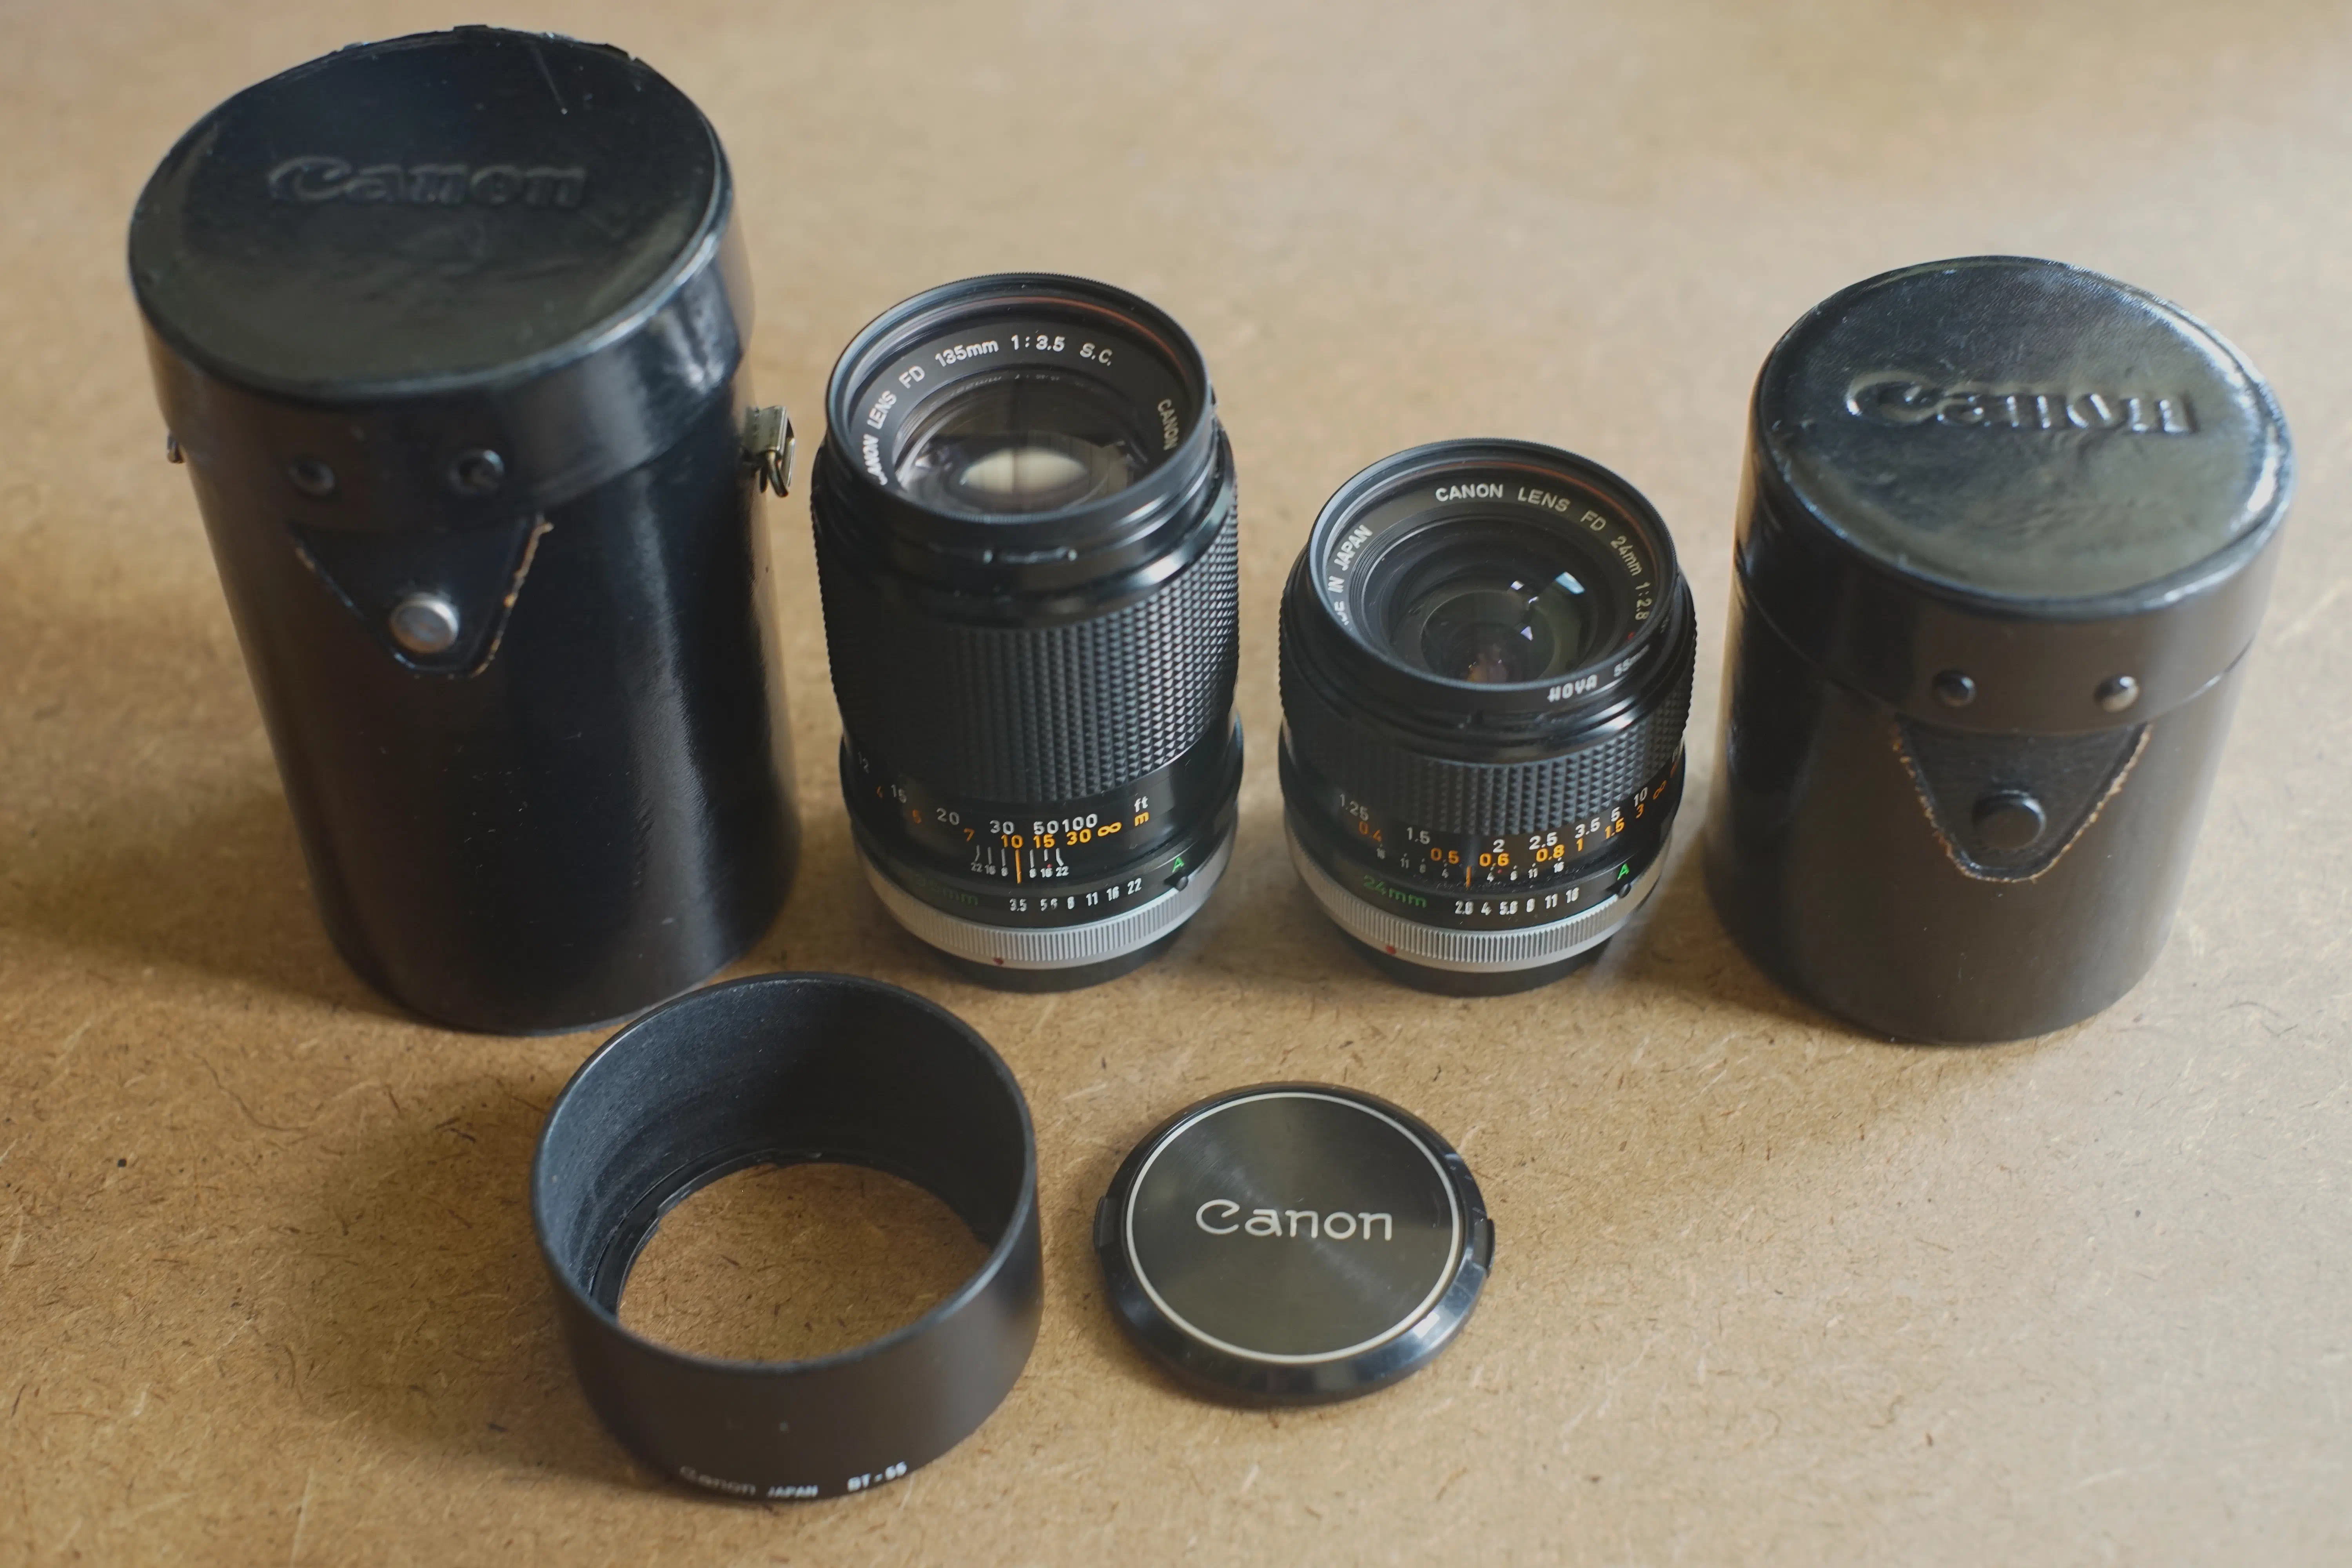
My father owned an old Canon film camera which he used before the age of digital photography, along with three Canon FD prime lenses. These lenses are a 24mm f/2.8, a 50mm f/1.8 lens, and a 135mm f/3.5. Since he doesn’t use the camera anymore, he gave the lenses to me. I don’t use the 50mm lens since it is inferior to the Super TAKUMAR, but both the 28mm and the 135mm lenses have great image quality. They can be seen in Fig. 3.
3 Choosing a mirrorless camera body
The camera body is the expensive part. Here we need to decide if we require a full frame sensor, or if APS-C suffices. Choosing APS-C can not only save lots of money but also improve image quality at wider apertures — the crop factor cuts out the edges of the frame, which suffer most from low sharpness and other lens imperfections prominent on vintage lenses. That being said, to capture the original character of the lens, or to maximise bokeh, a full frame body should be chosen. The remainder of this section focuses on full-frame cameras.
Unfortunately, we cannot use a more budget-friendly full-frame DSLR, because the presence of the mirror increases the distance between the sensor and the back of the lens, which wouldn’t leave enough space for the lens adapter in most cases.[8] Moreover, DSLRs don’t tend to allow for focus peaking, which is a great focusing aid when using manual lenses. More on this in Sec. 5.
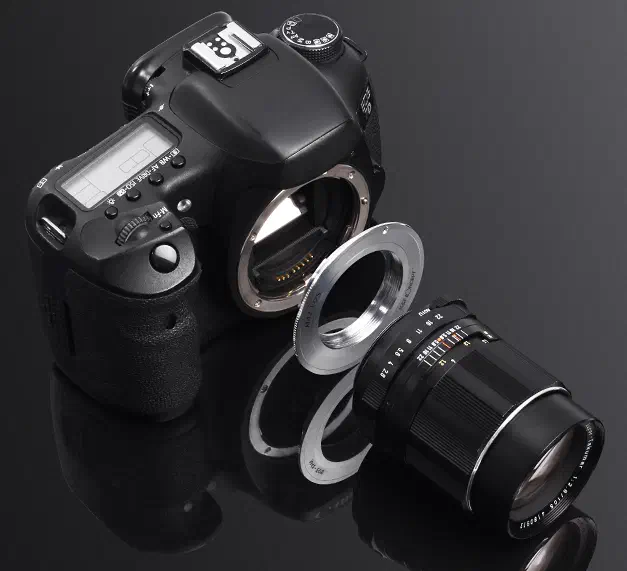
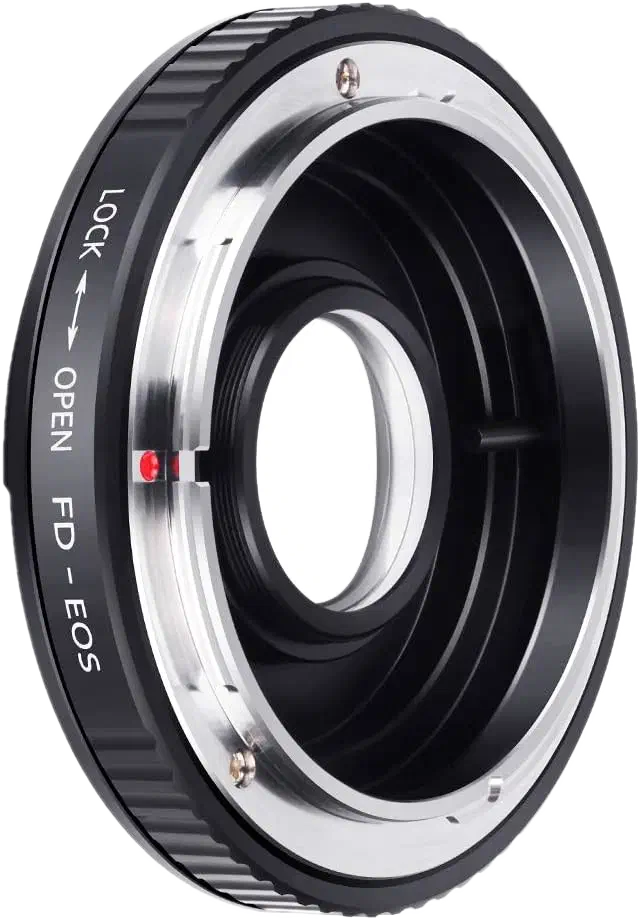
There are M42 to Canon EF mount adapters available such as the one shown in Fig. 4, however most other vintage mounts cannot be adapted to DSLR mounts such as Canon EF without losing infinity focus (thereby turning them into macro lenses). In such cases, an adapter with an optical correction element needs to be used to still allow the lens to be focused to infinity, such as the one shown in Fig. 5. However, the presence of the additional optical element degrades image quality, and such adapters are therefore not recommended. Tbl. 2 shows the compatibility of popular vintage lens mounts with modern DSLR mounts. If one only intends to shoot M42 lenses, then any DSLR mount will do. However, outside of M42, adaptability is poor. Of the available DSLR mounts, Canon EF has the best compatibility with vintage lens mounts.
| M42 | C/FD | K/AR | C/Y | M/MD | N/F | |
|---|---|---|---|---|---|---|
| C/EF | ✓ | ✗ | ✗ | ✓ | ✗ | ✓ |
| N/F | ✓ | ✗ | ✗ | ✗ | ✗ | ✓ |
| P/K | ✓ | ✗ | ✗ | ✗ | ✗ | ✗ |
| S/A | ✓ | ✗ | ✗ | ✗ | ✗ | ✗ |
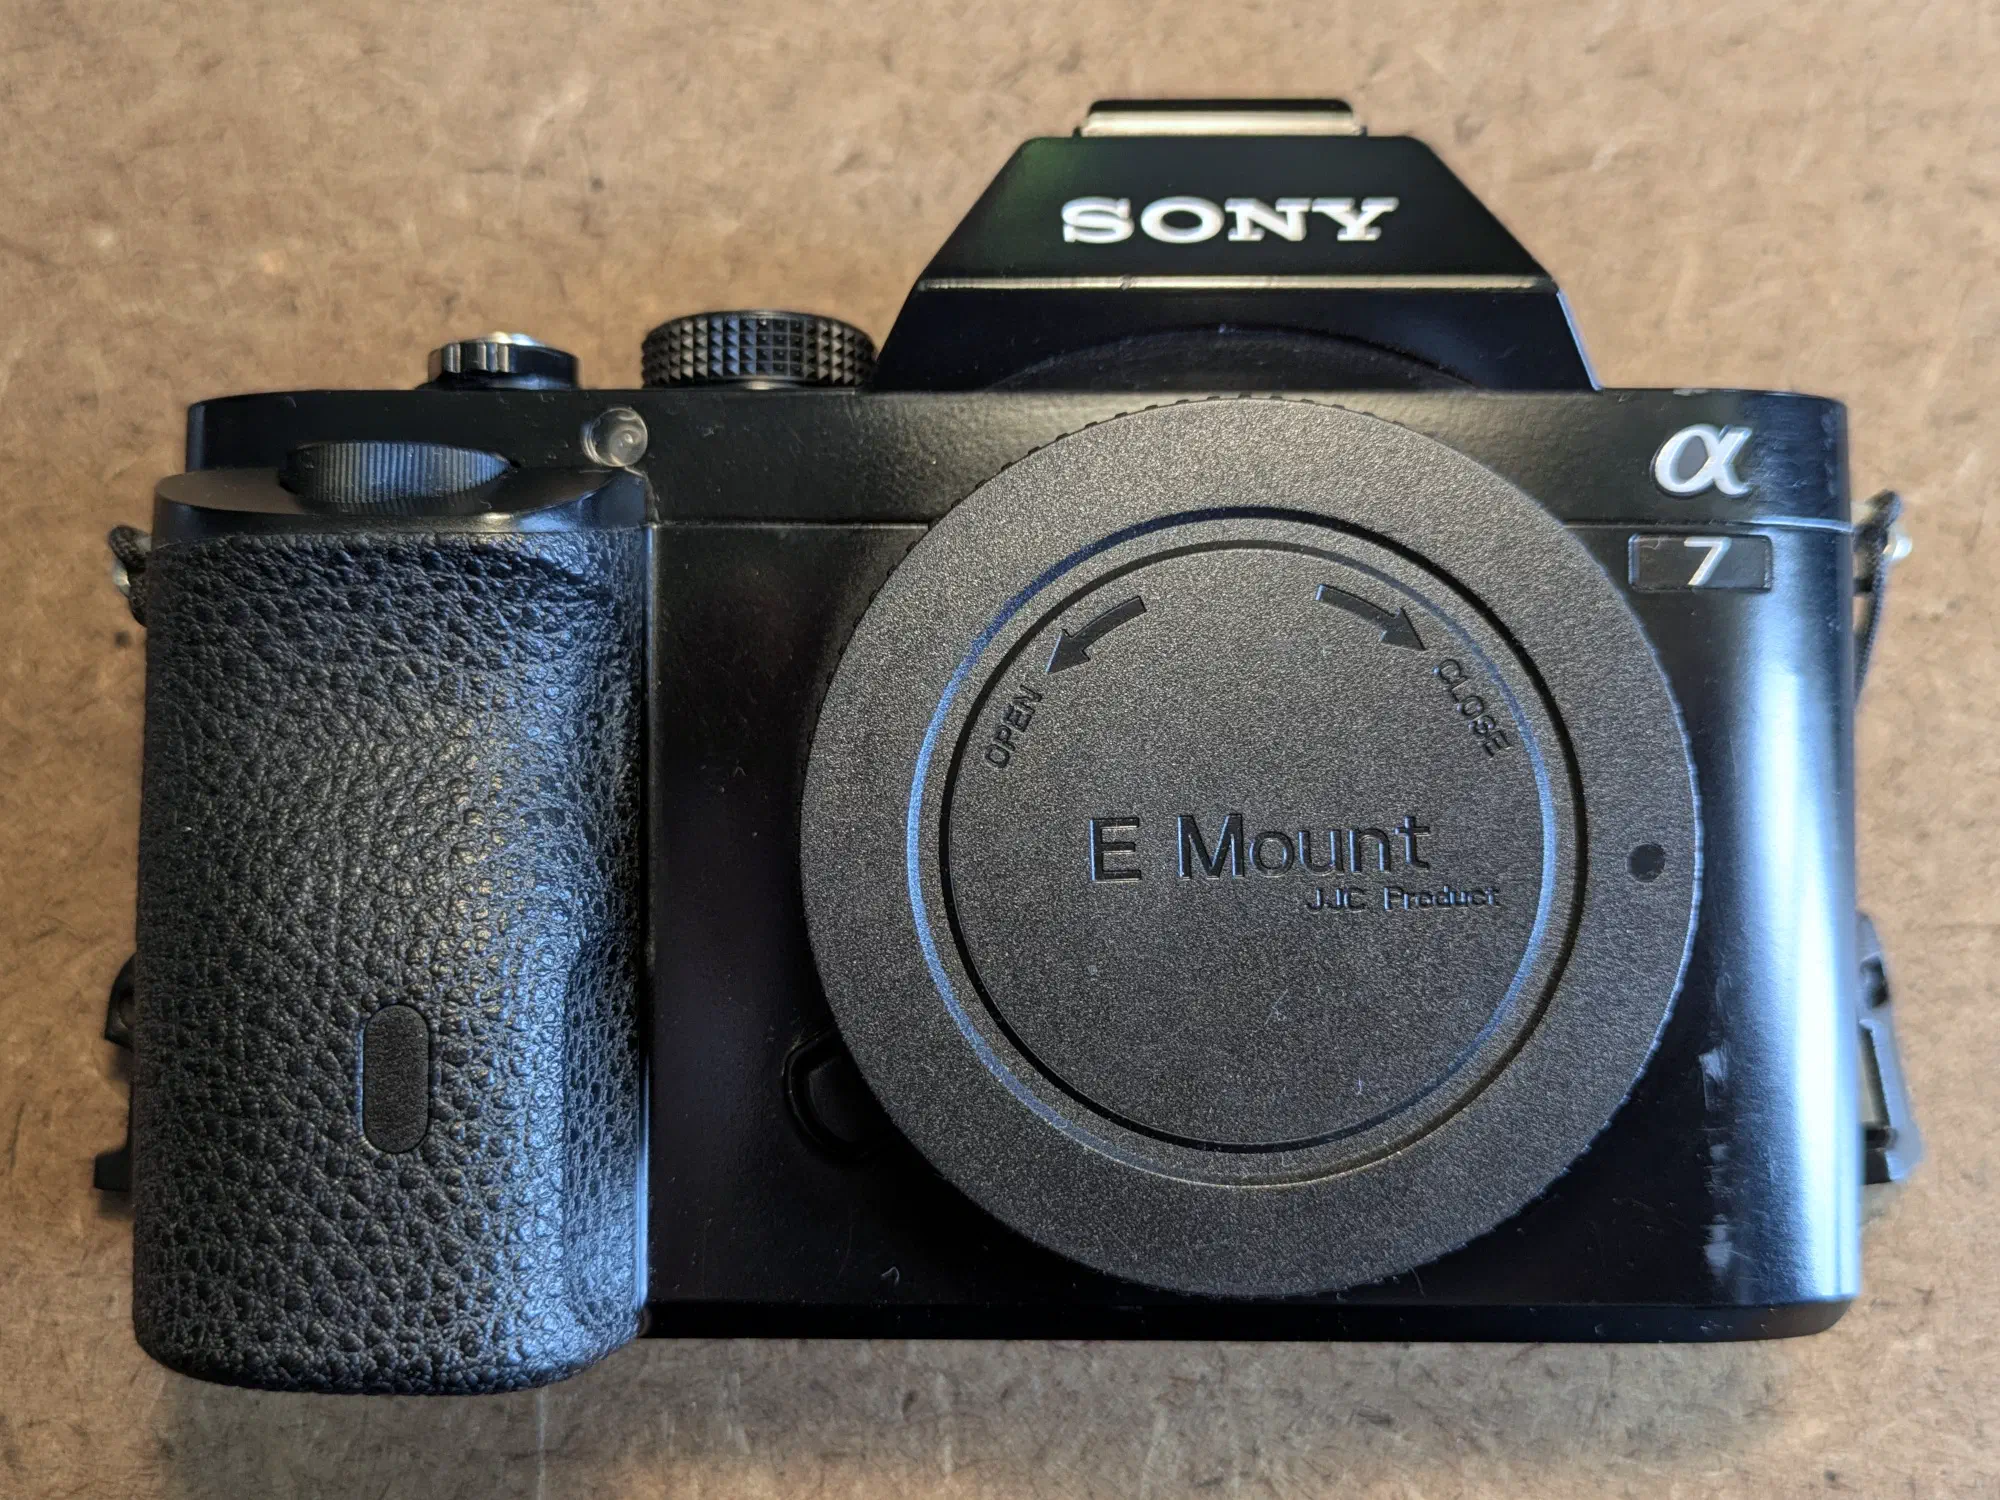
Luckily we can save a lot of money here too by buying a second hand body. The most affordable full-frame mirrorless cameras are from the Sony α7 series. I acquired a used α7 I (this camera was released in October 2013) in 2020 for £300 on Gumtree from a nice gentleman in Oxford. At the time, this was a very good price (back then, this camera more typically sold for around £400). Looking at current offers, the α7 I appears to be much harder to come by compared to a few years ago. However, with enough patience one can probably find one for under £250.
Alternatively, one could buy an α7 II or III. The α7 II was released just over a year after the first generation α7. While both generations use the same sensor and thus offer the same image quality, the α7 II features in-body image stabilisation, a big plus when shooting with vintage lenses (since the lenses have no stabilisation, in-body stabilisation enables shooting at lower shutter speeds without needing to use a tripod). The α7 III was released in 2018 and is significantly more expensive second hand than both the α7 I or II, but has an updated sensor with much better low light performance and greater dynamic range. Unlike previous generations, the α7 III also offers 4K video, if that sort of thing matters to one. It should also drop in price now that the α7 V has been released.
4 Adapting the lens
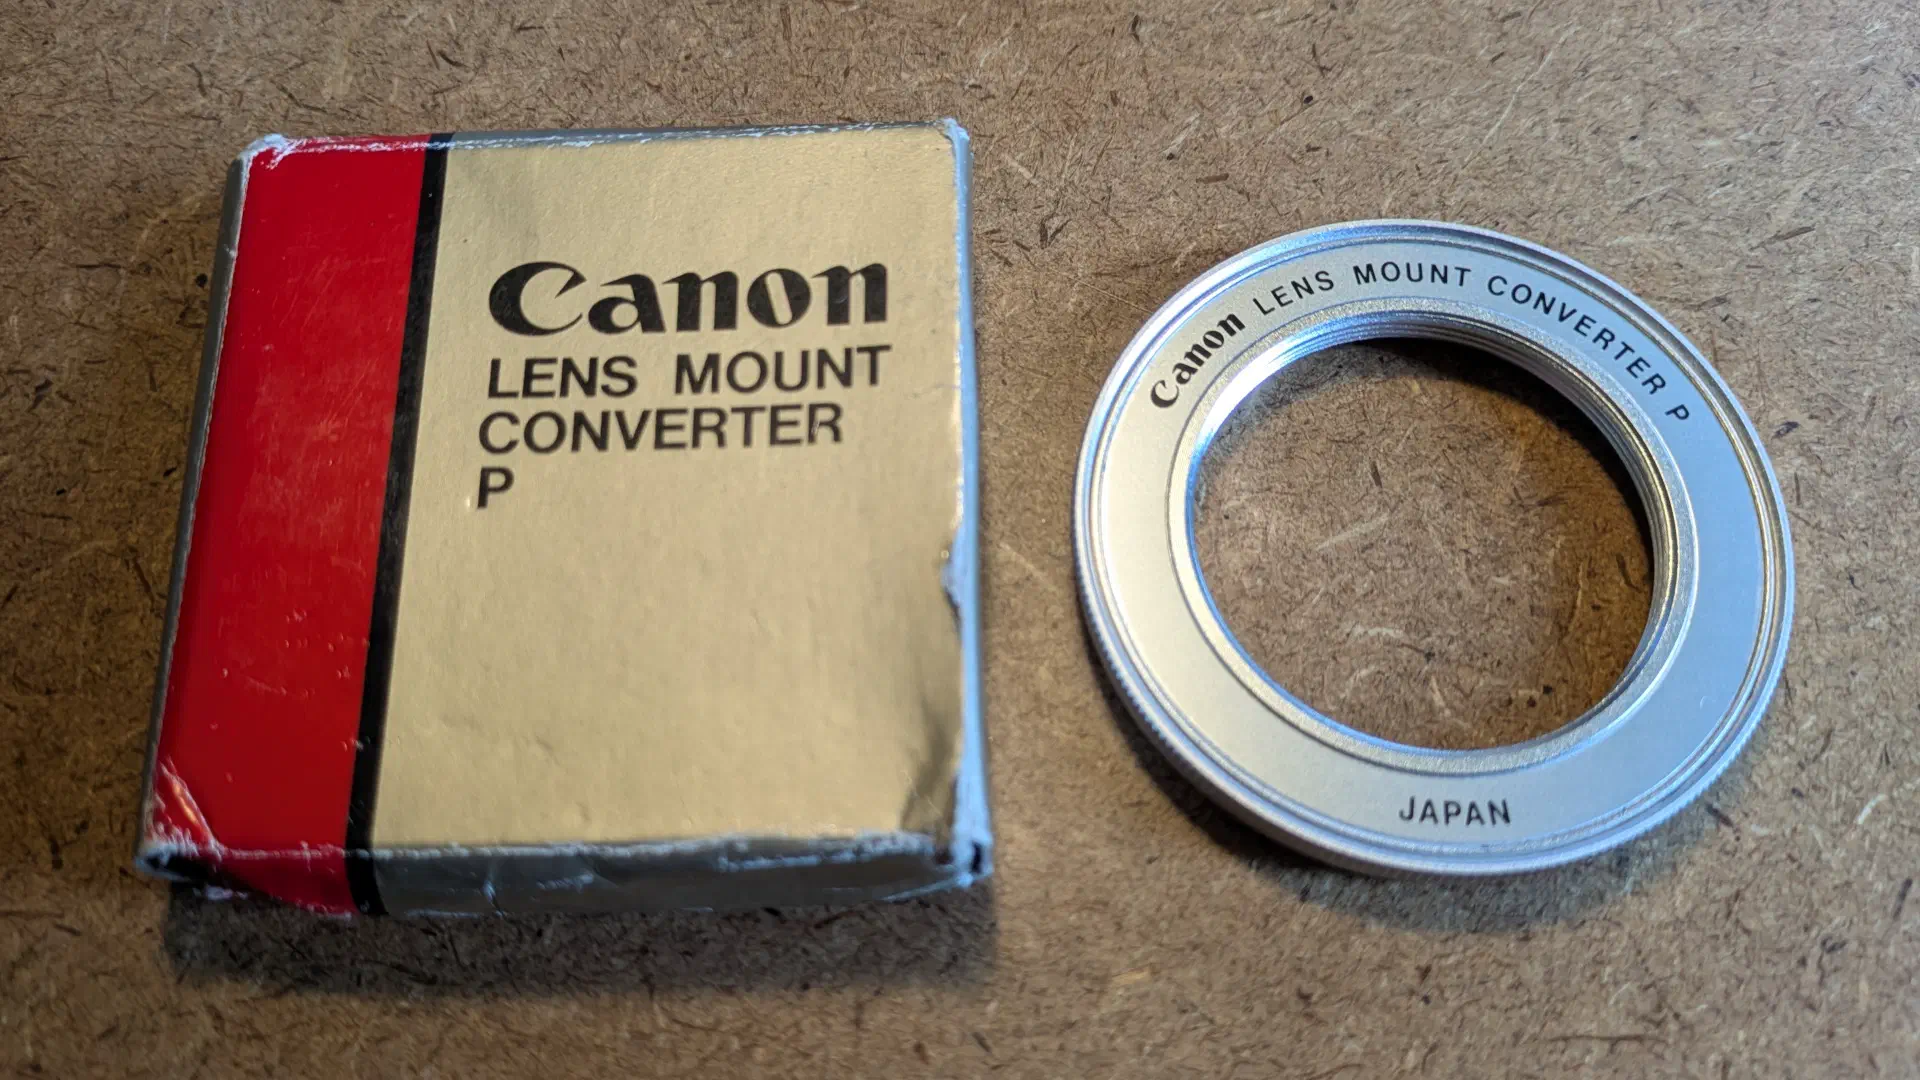
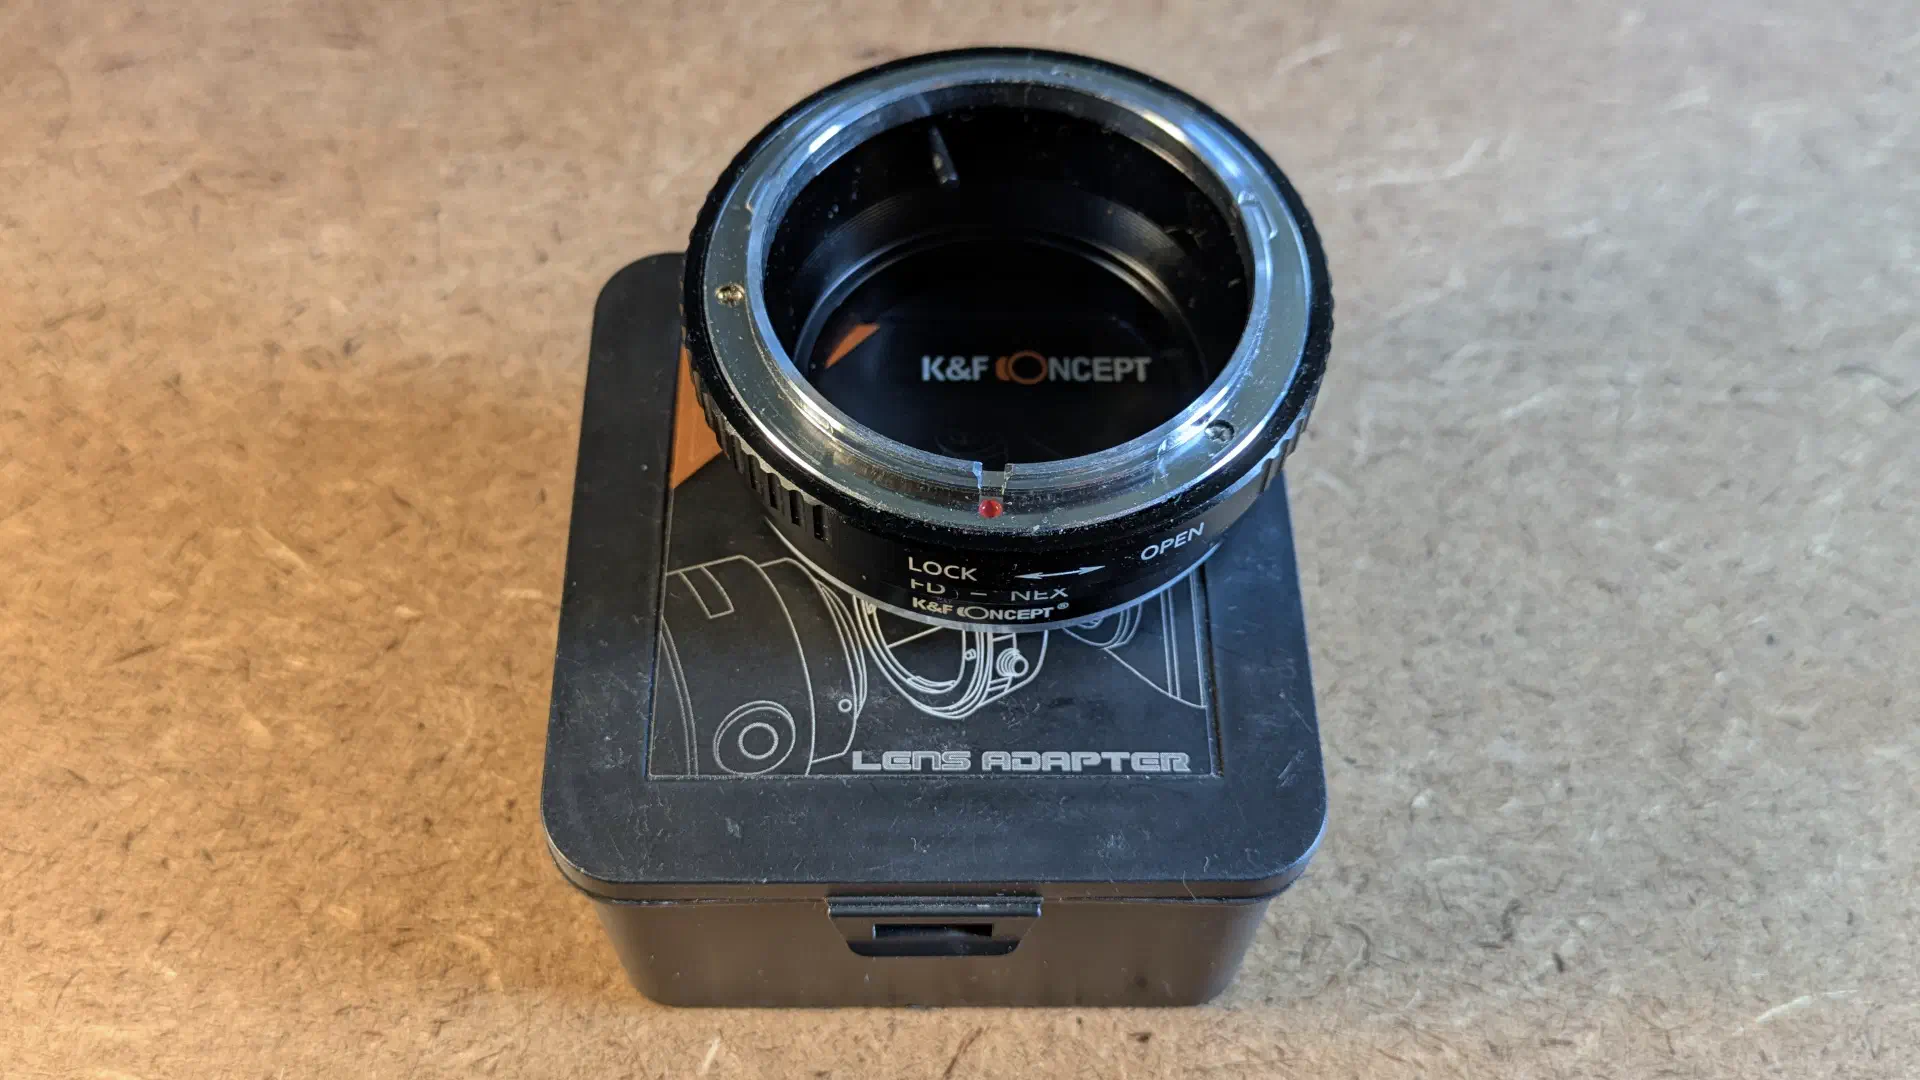
The kind of adapter to purchase obviously depends on the lens’s mount. I opted to purchase two adapters, one M42 to Canon FD converter (see Fig. 8), and one K&F Canon FD to Sony E-mount adapter. For M42 lenses I stack the adapters on top of each other, and for FD lenses I only use the FD to E-mount adapter. Being able to use two different lens mounts requires two adapters in either case, and I’d rather have one large and one small adapter than two large ones. Whereas the FD to E-mount adapter is a modern creation, the M42 to FD converter is vintage.[9][9]: I picked it up for £20 on eBay some years ago.
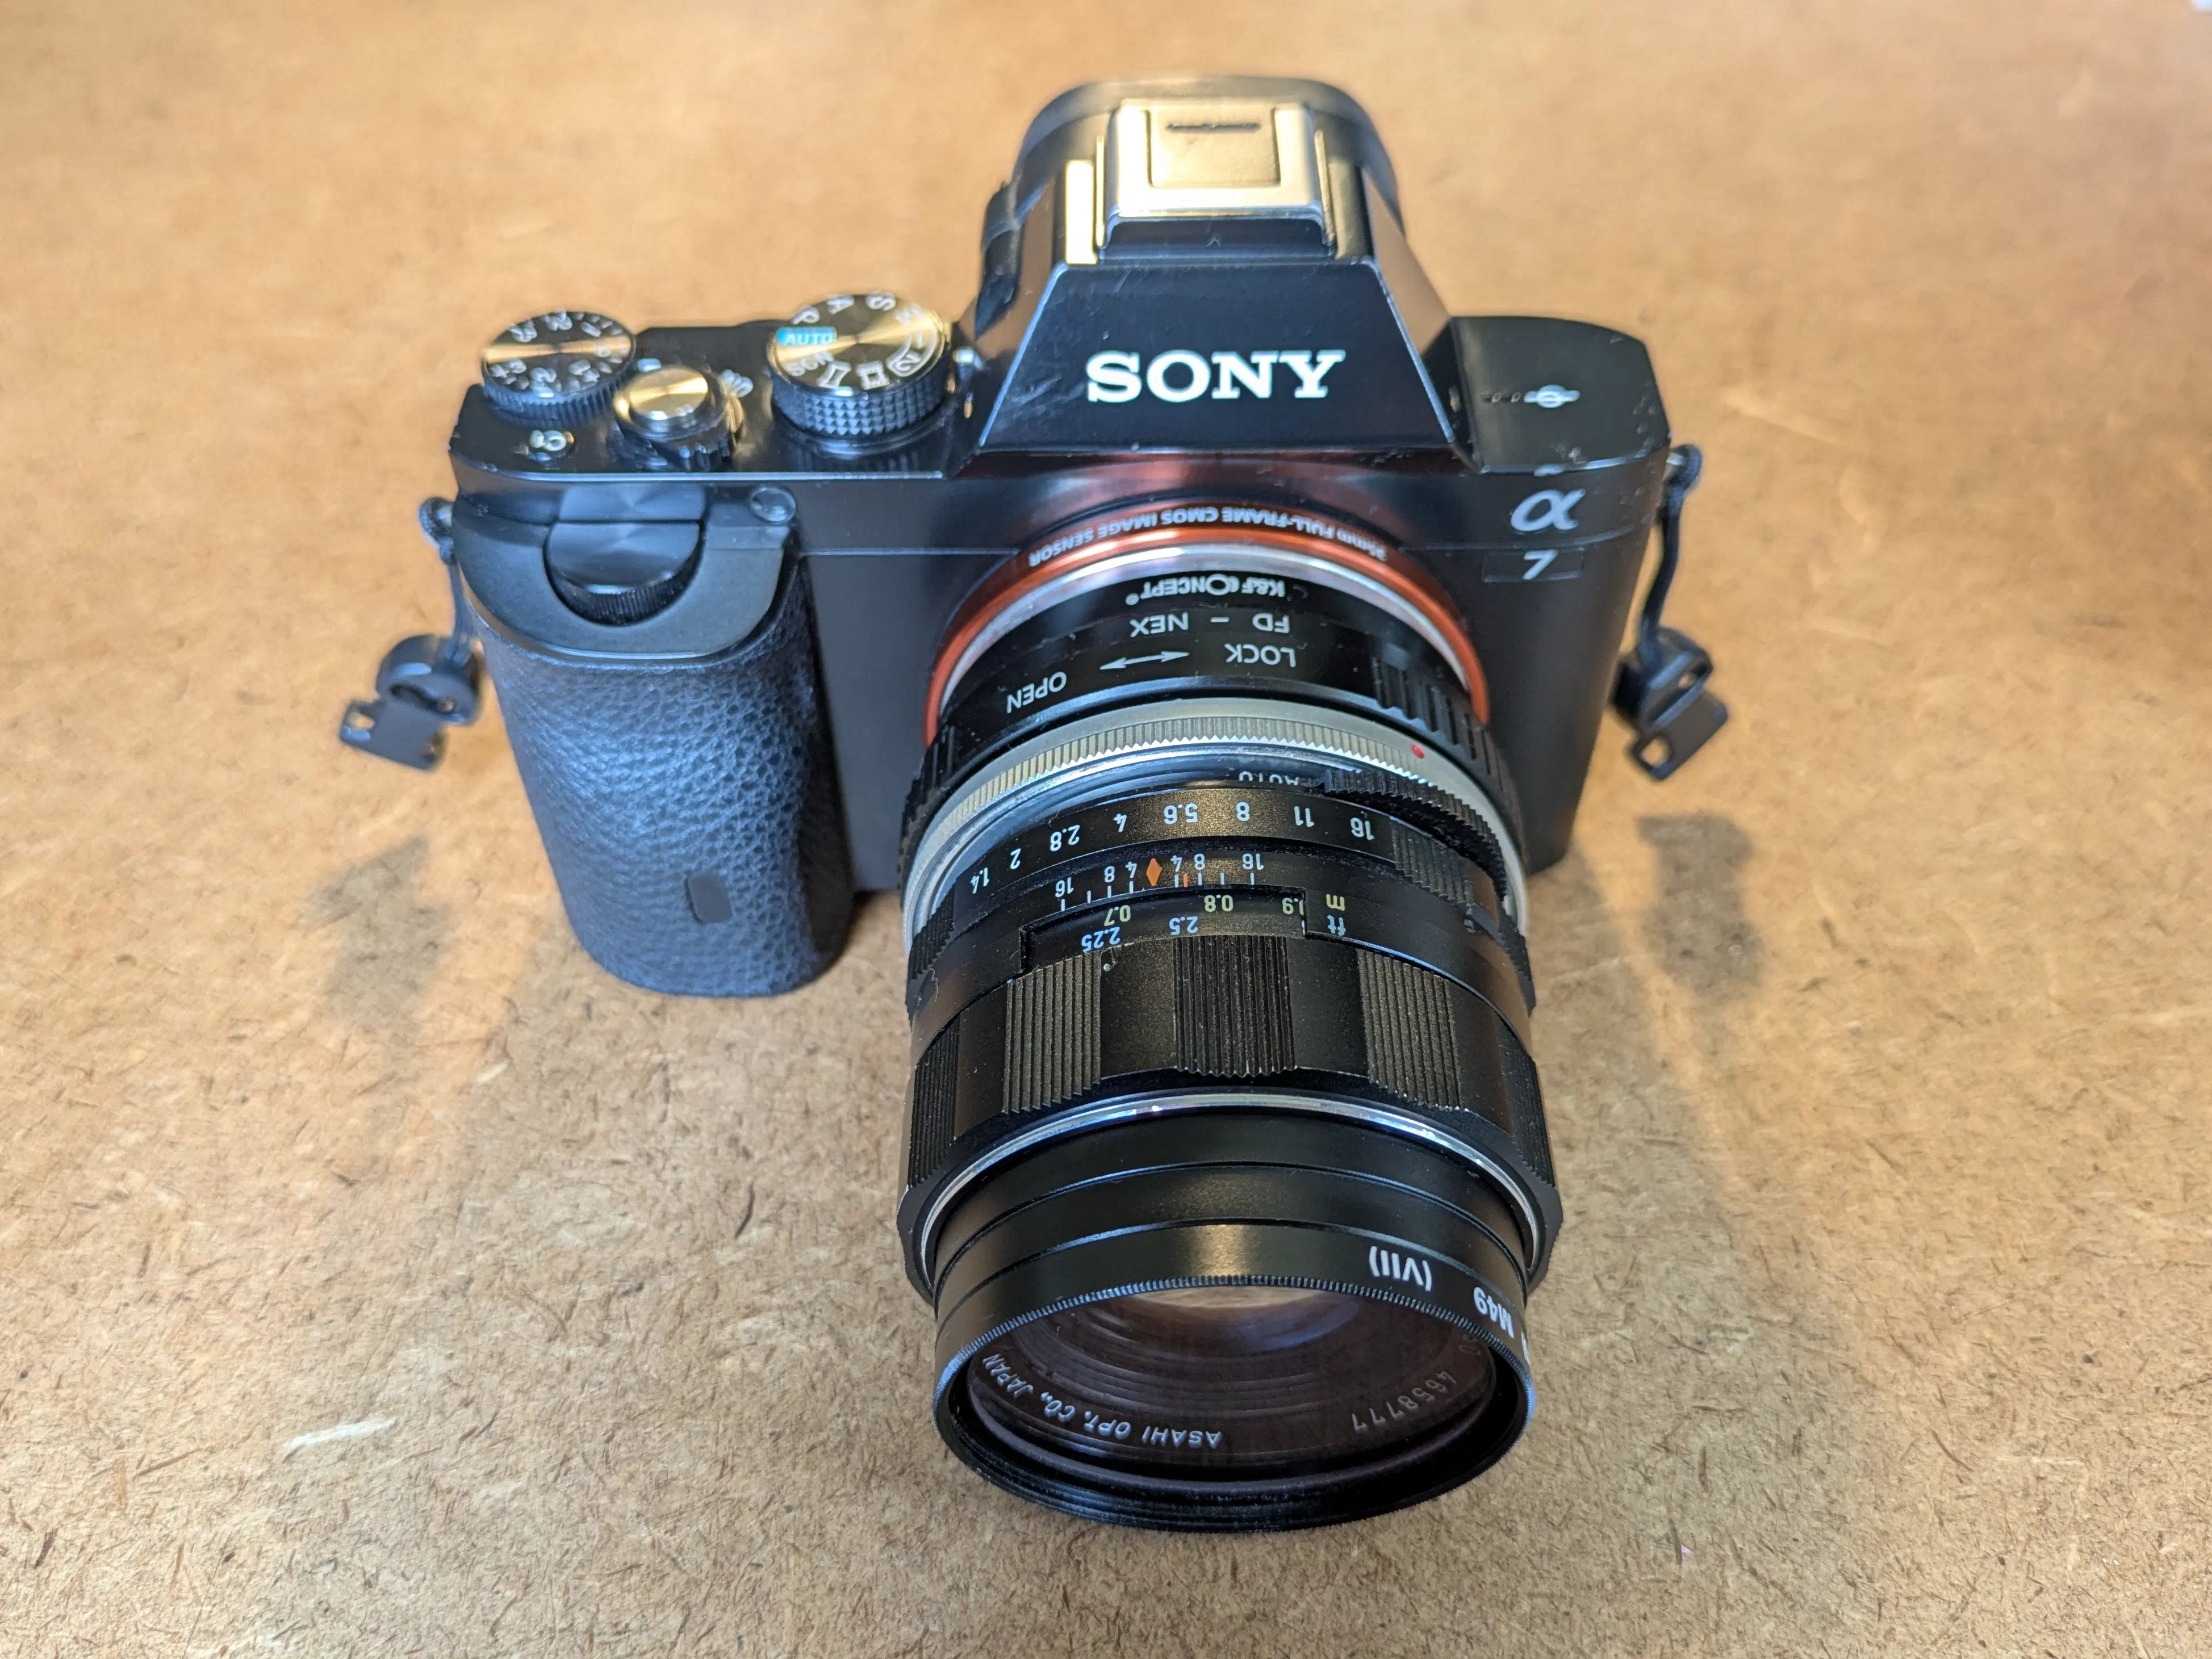
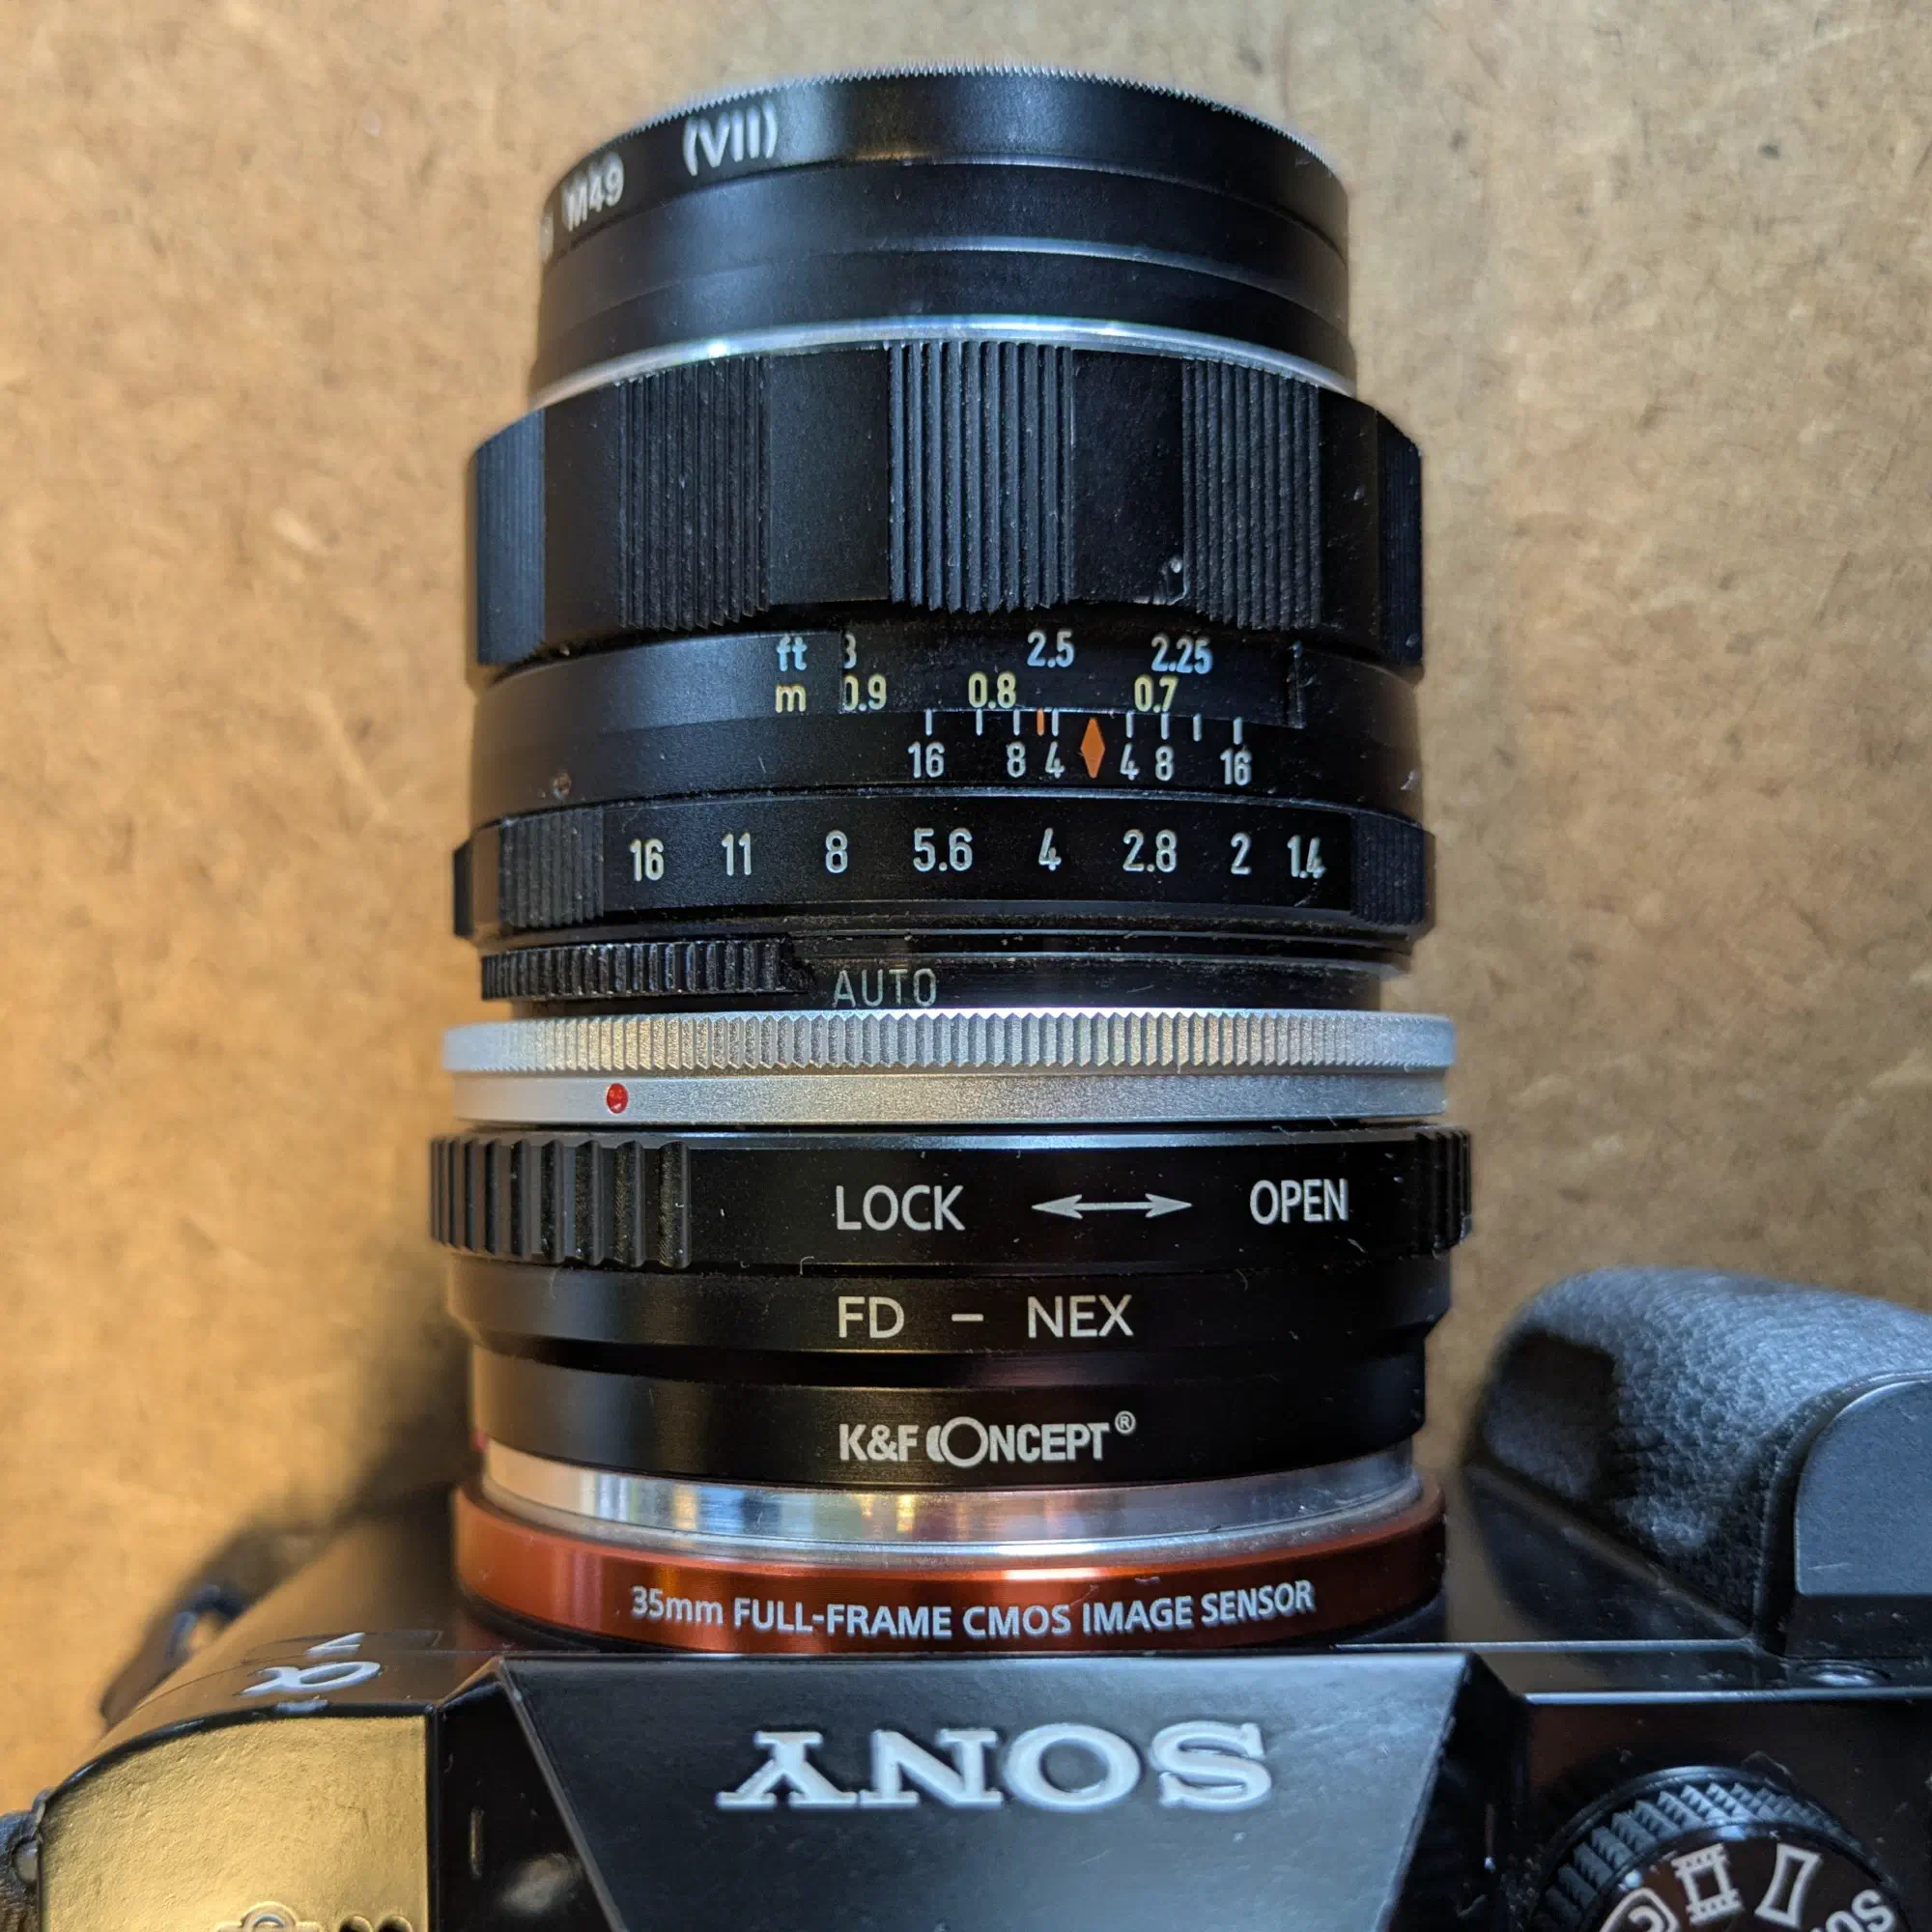
Fig. 7 shows the adapted Super TAKUMAR lens mounted on the Sony α7 I. The M42 to FD adapter is the silver ring that sits just behind the lens.
5 Setting up the camera
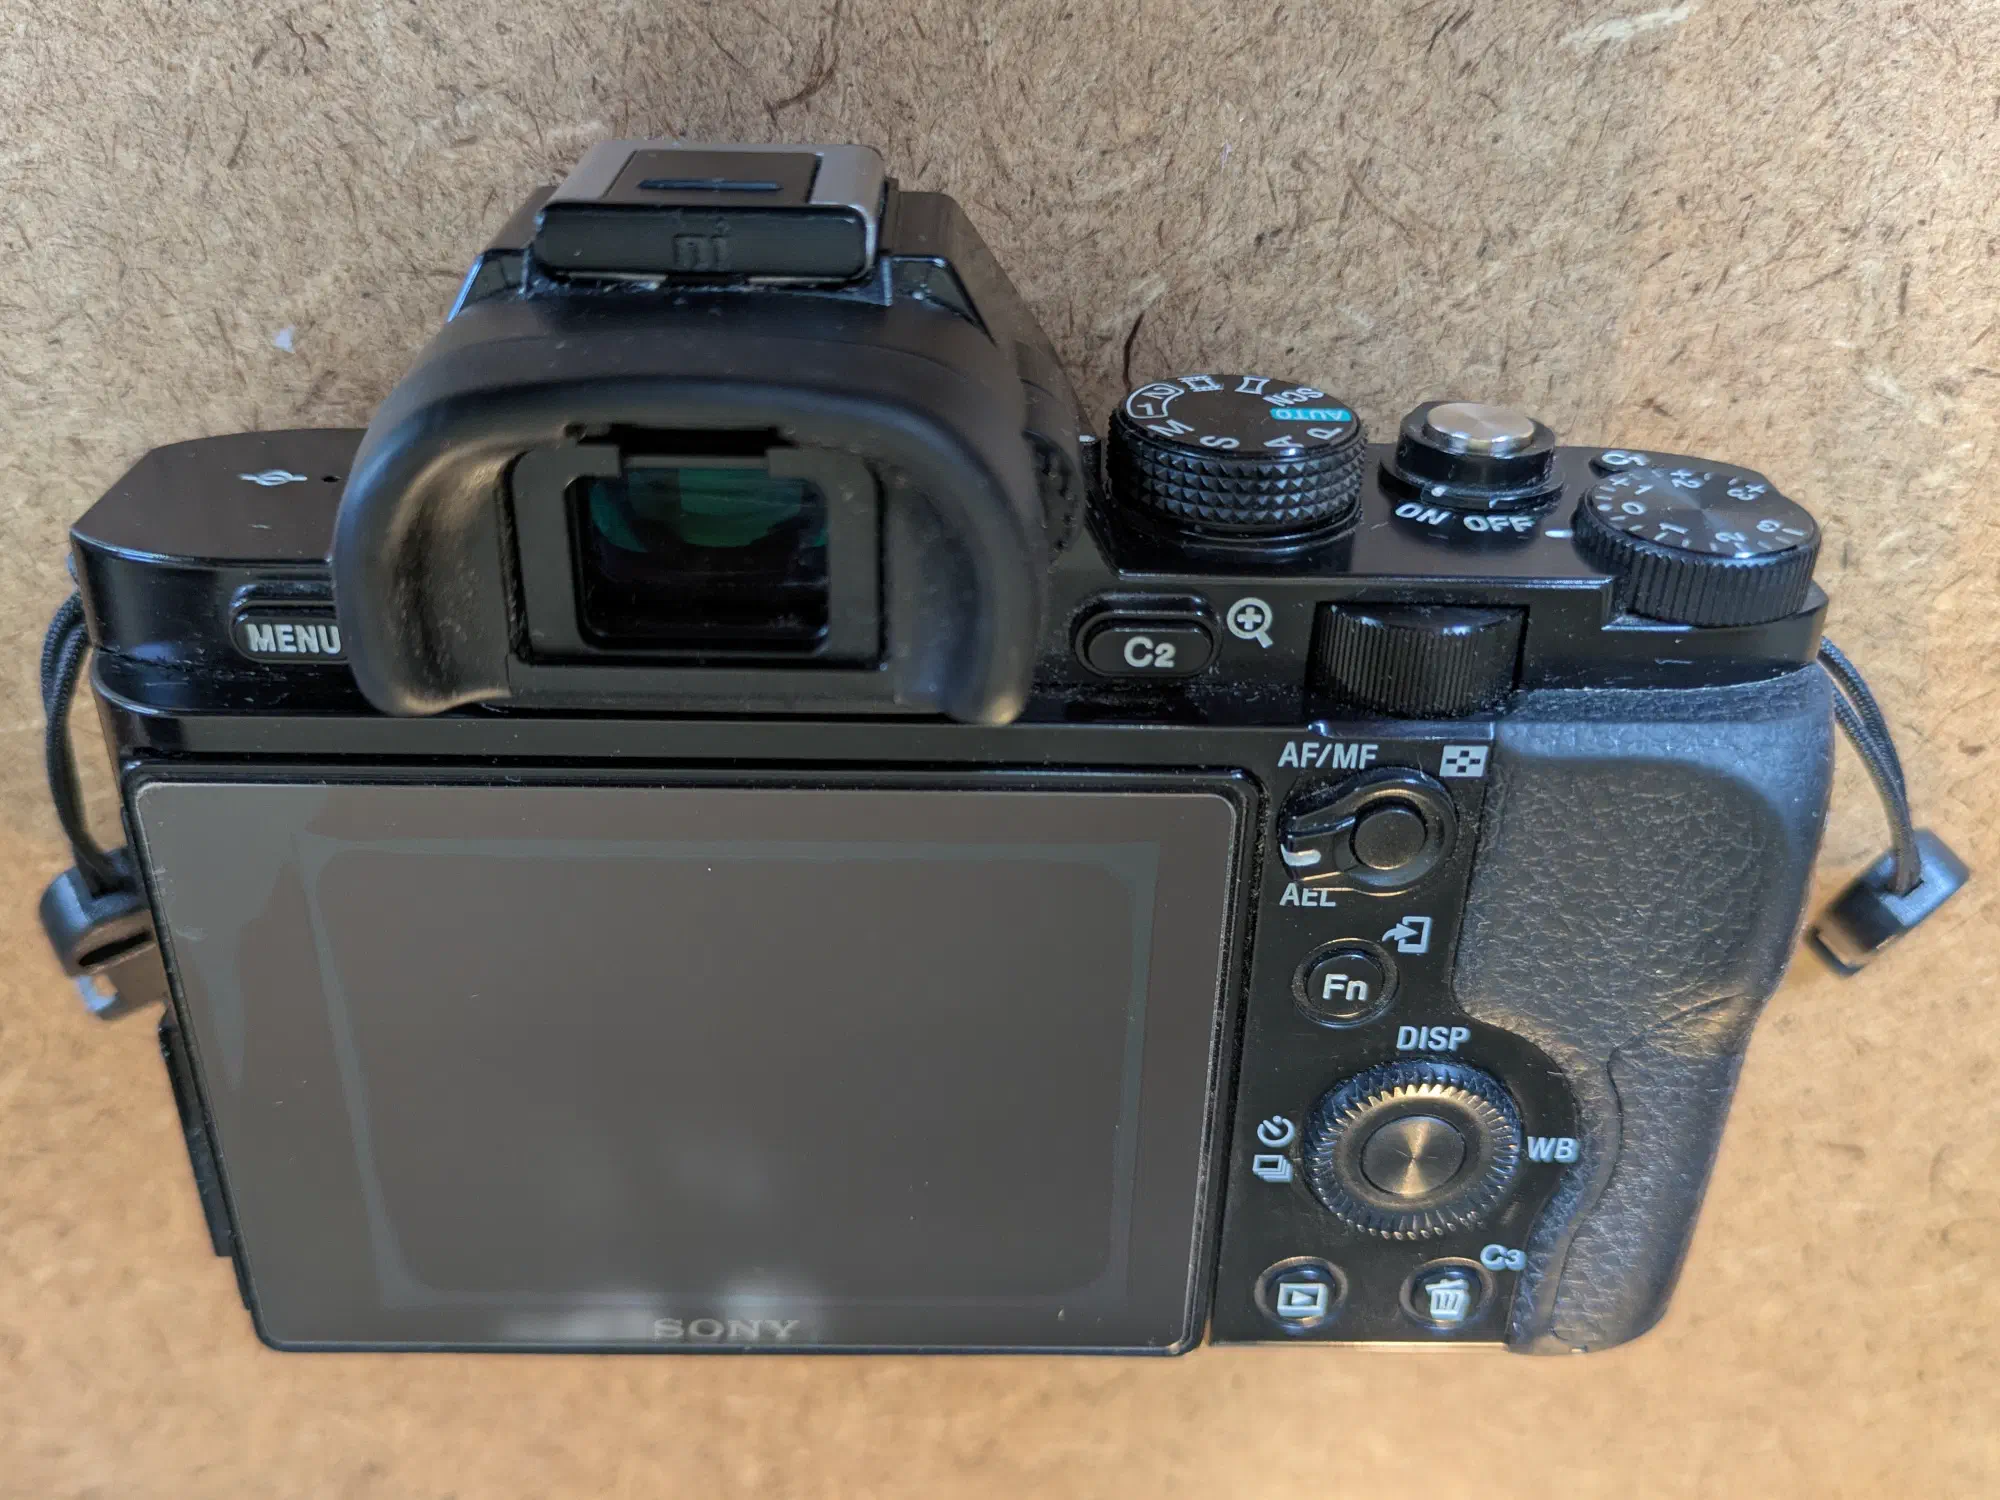
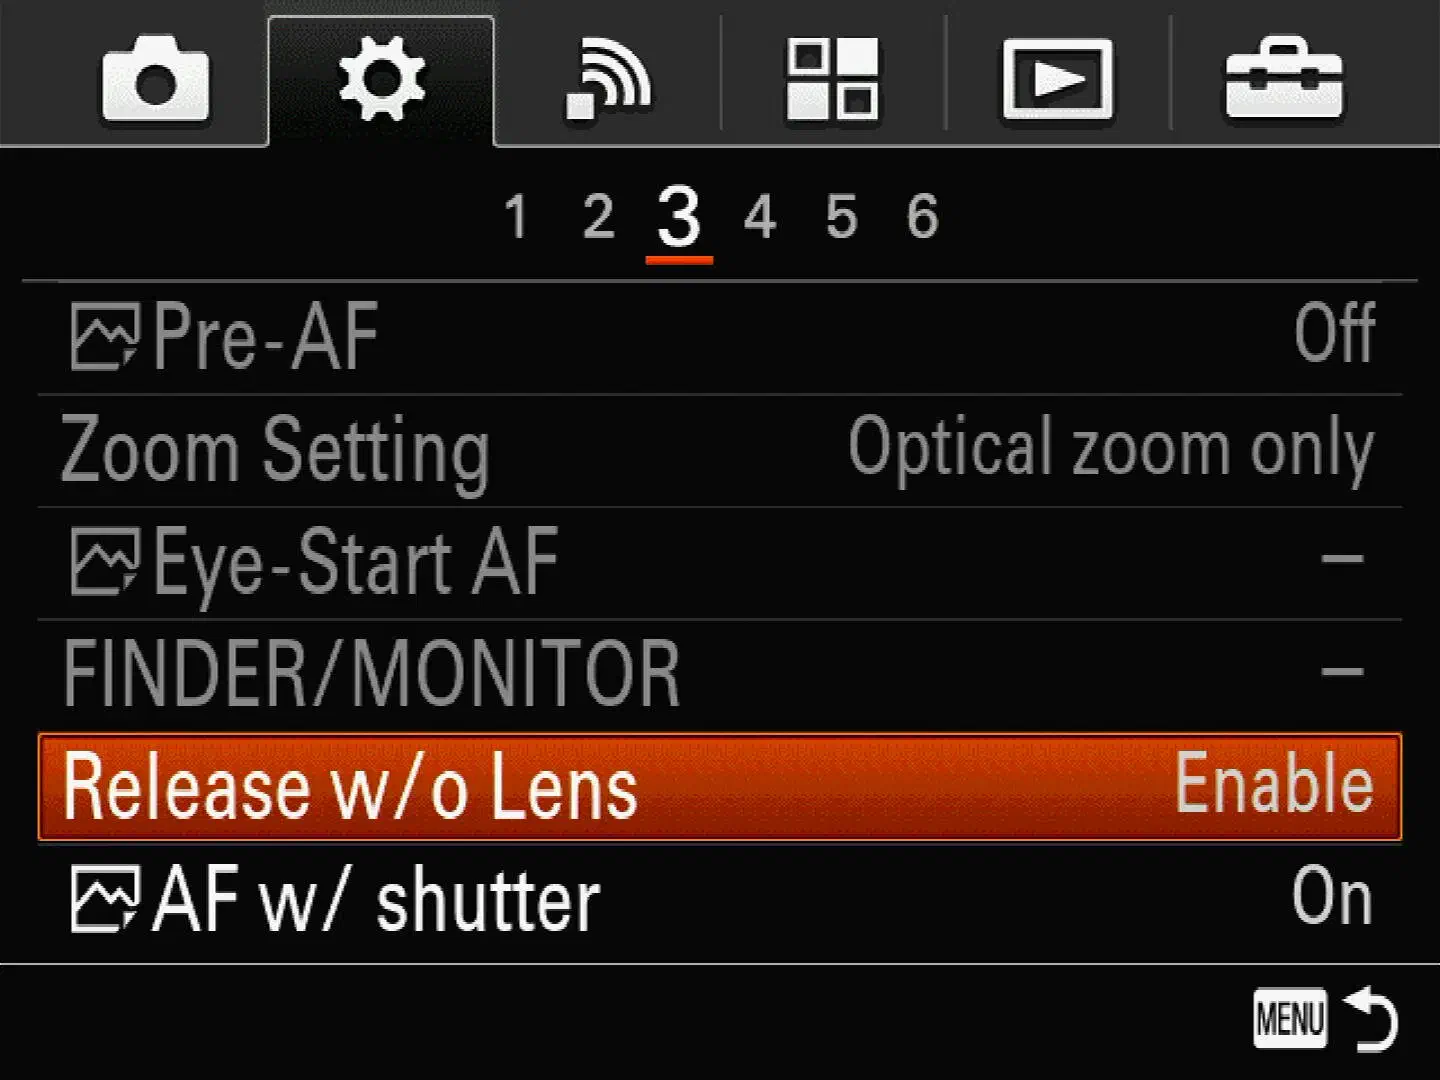
To enable shooting with manual lenses, the “Release w/o Lens” setting needs to be enabled (see Fig. 10) in the Sony α7 I’s settings. This is because the lack of electronics in the vintage lens makes the camera think that there is no lens mounted to it, and without a lens it refuses to take pictures by default.
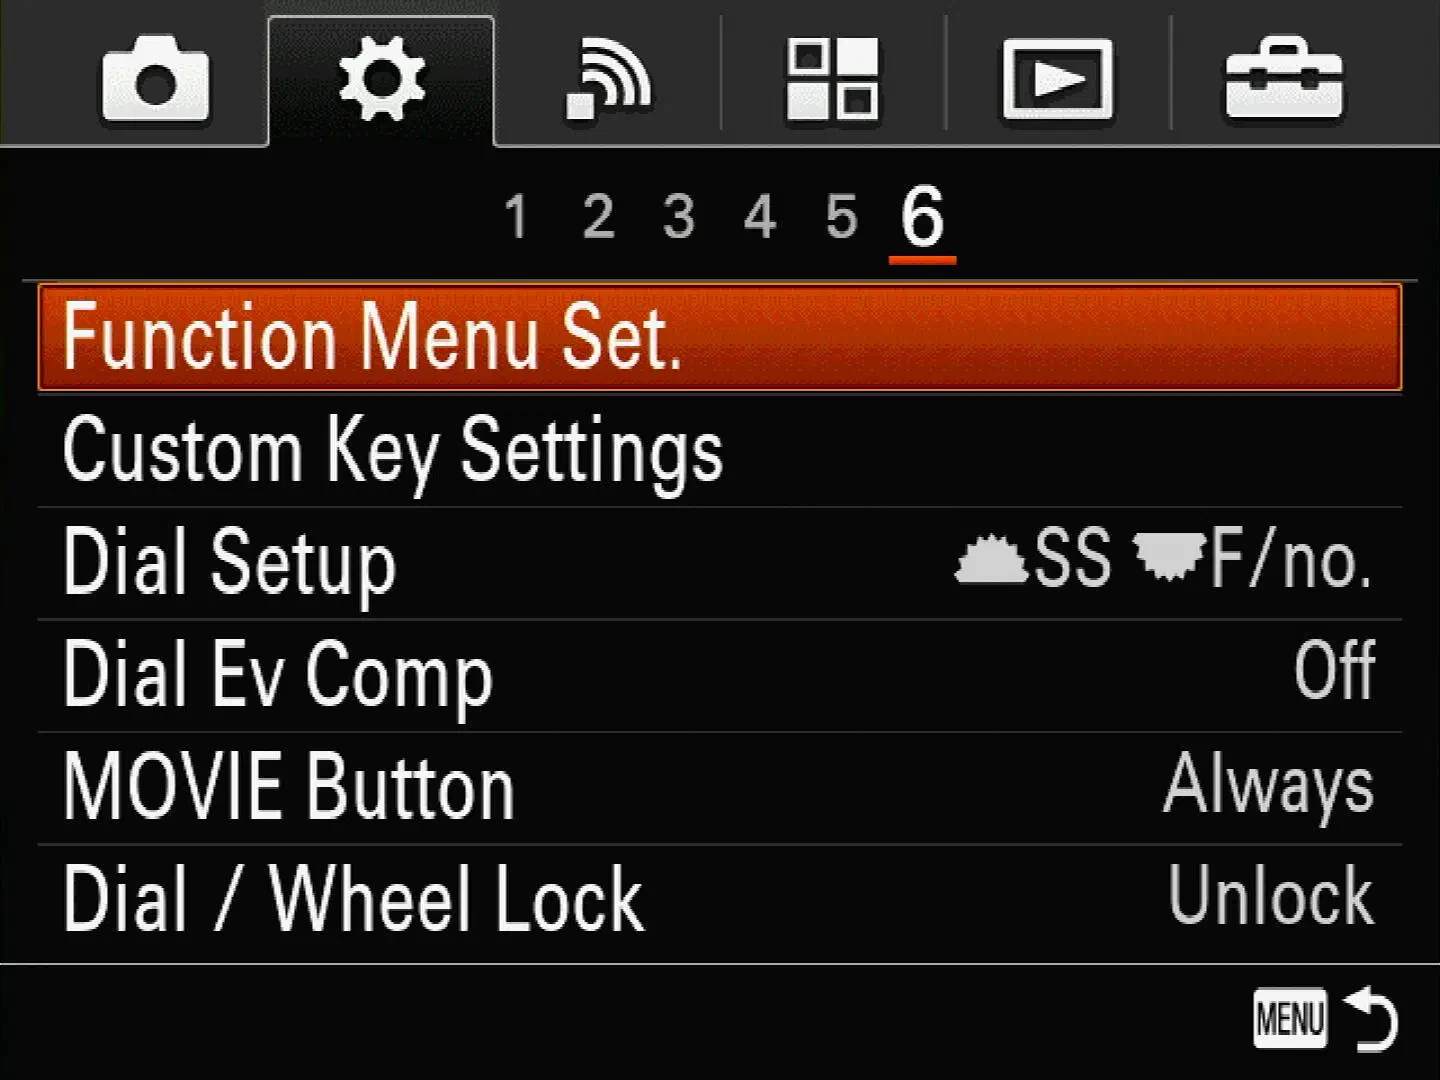
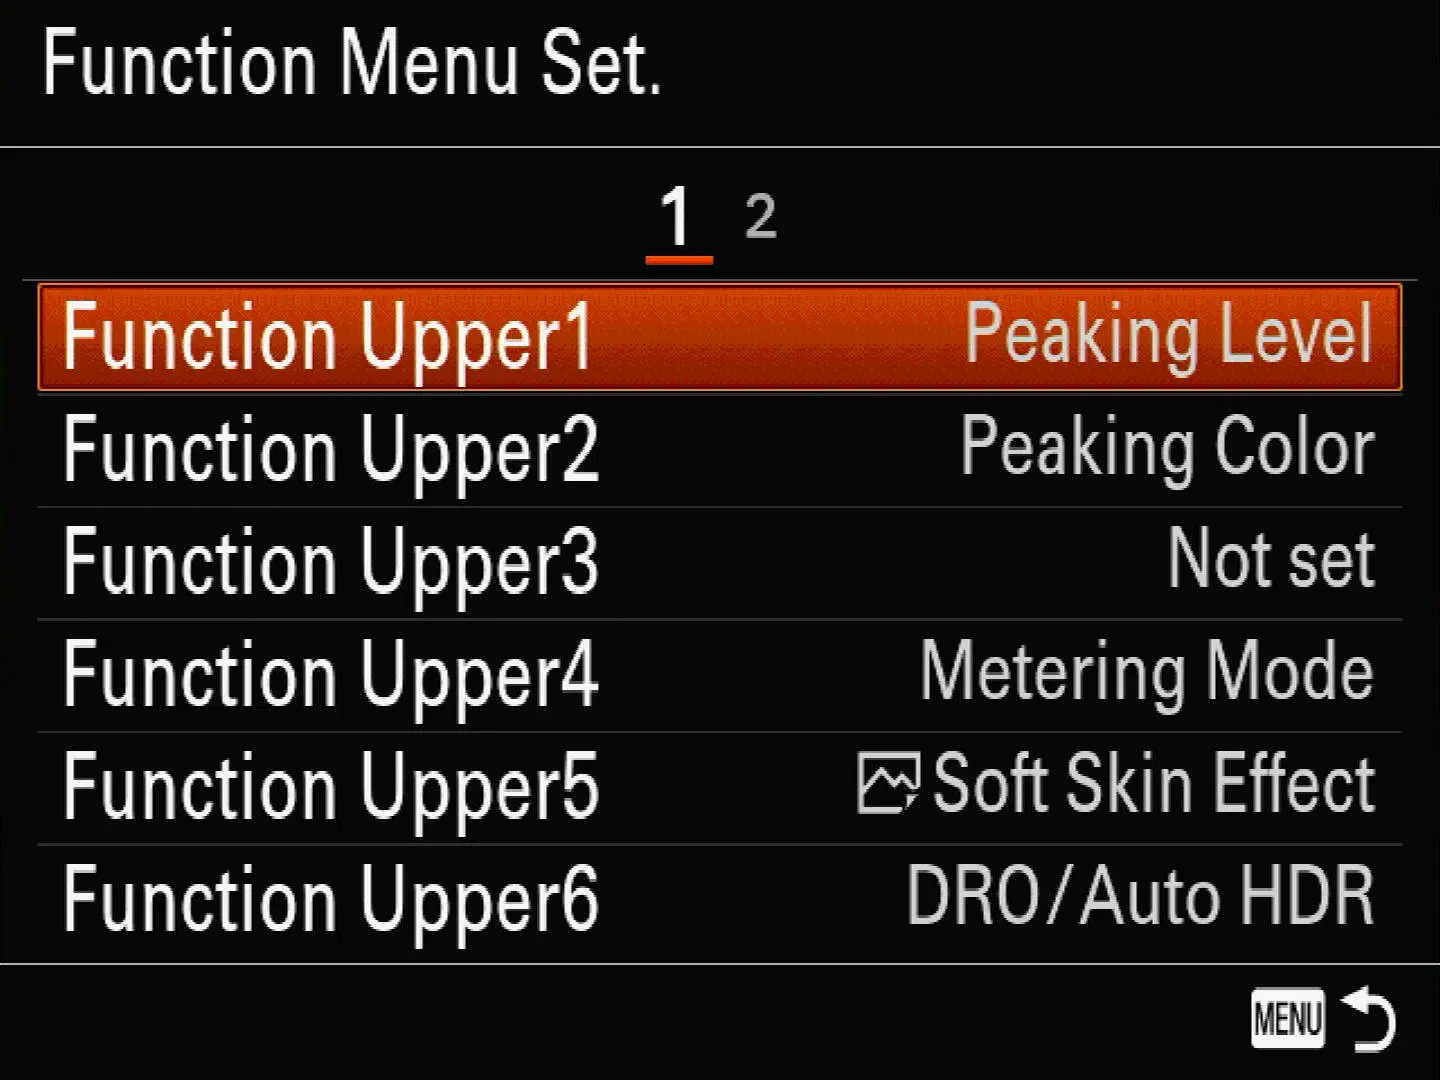
To aid in focusing, I recommend setting up both focus peaking and digital zoom. Focus peaking highlights high spatial frequencies in the image in a color of one’s choice and can thus be used to adjust focus. Three peaking colors are available: red, yellow, and white, alongside three peaking levels: HI, MID, and LO (and OFF). I found that red and HI works best. It is sometimes useful to be able to change peaking settings quickly, for example to change the peaking level from HI to MID. To this end, peaking settings can be assigned to the Fn button so they can be accessed quickly, as per Fig. 11.
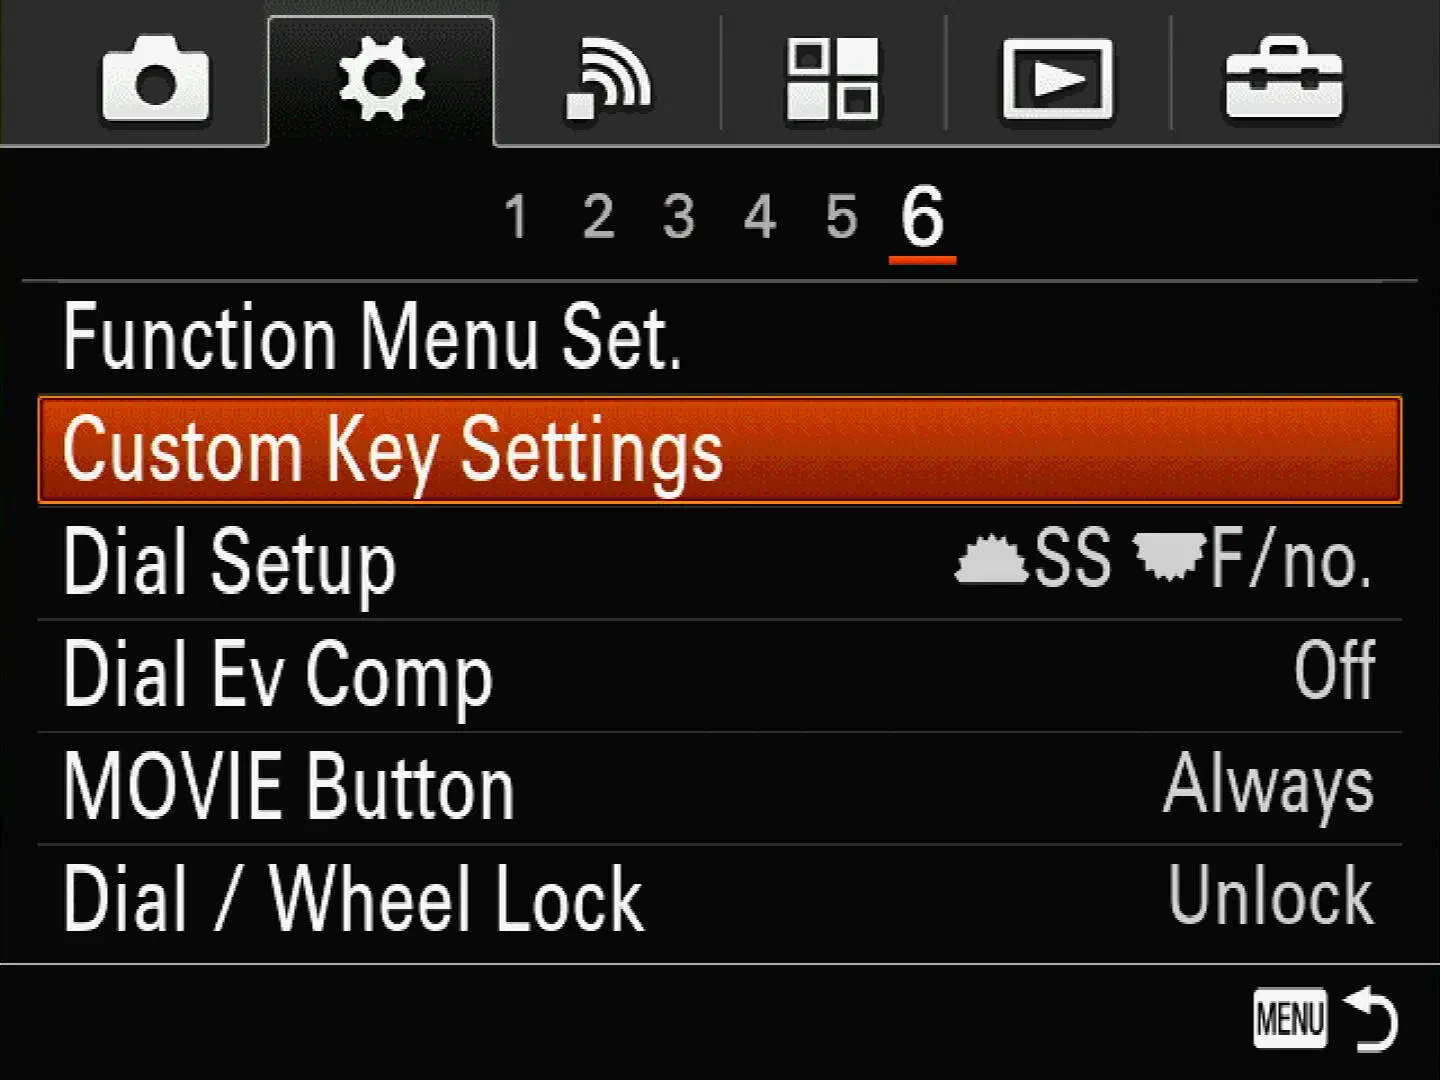
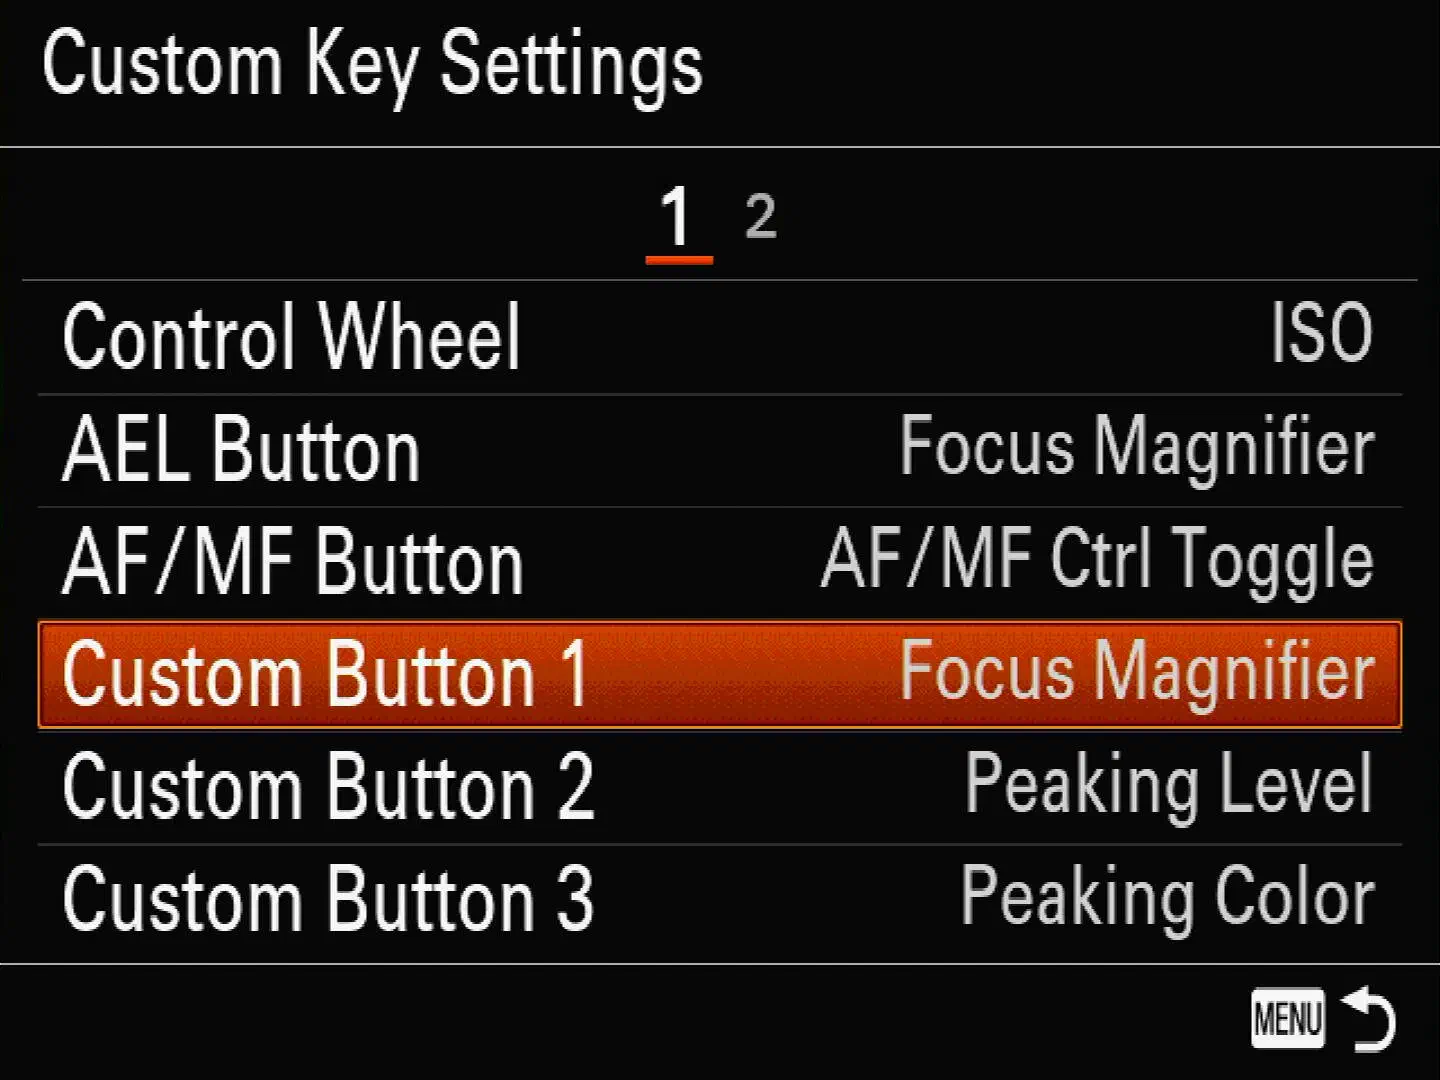
However, focus peaking is often inadequate when shooting wide open, where precise focus is crucial. This is where the Focus Magnifier comes in. I like to bind the Focus Magnifier function to the Sony α7 I’s C1 button, because it sits right next to the shutter button and is therefore easily accessibly. Fig. 12 shows how this may be done. Once the function is assigned, pressing the button once results in an orange rectangle appearing on the screen, indicating the region of the image that will be magnified. The two scroll wheels can be used to move the rectangle on the screen to select the region to be magnified.[10][10]: Though awkward at first, with some practice the use of the scroll wheels to adjust the magnification region becomes natural. Pressing the button a second time results in the selected region being magnified. To return to viewing the full image, the shutter button can be pressed lightly.
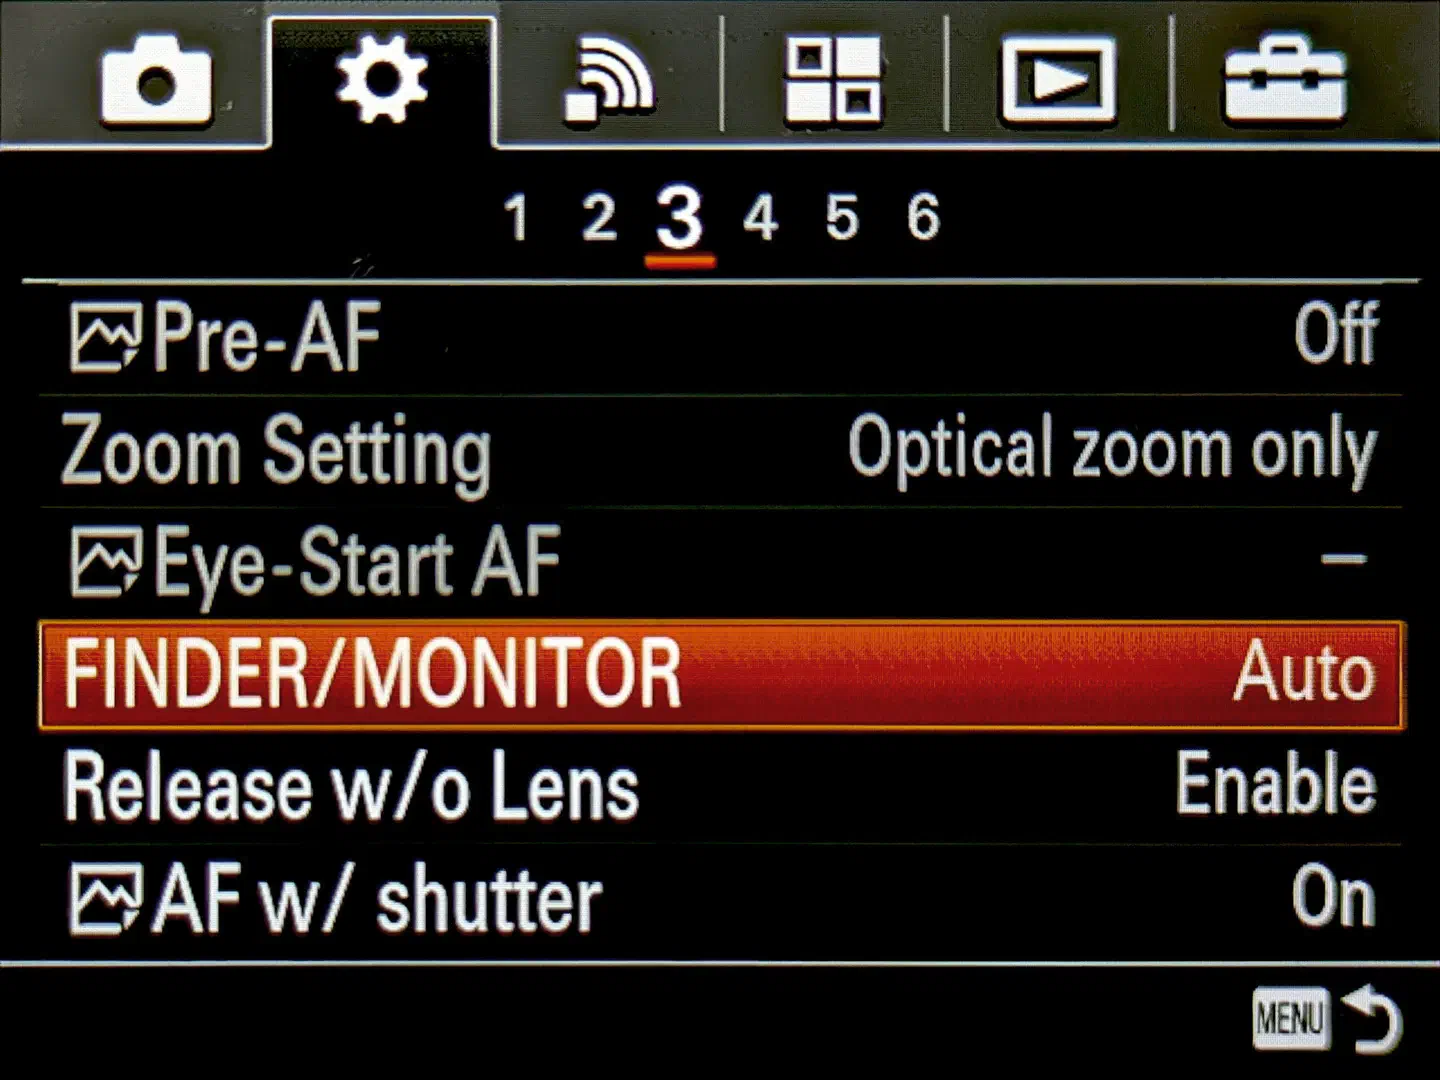
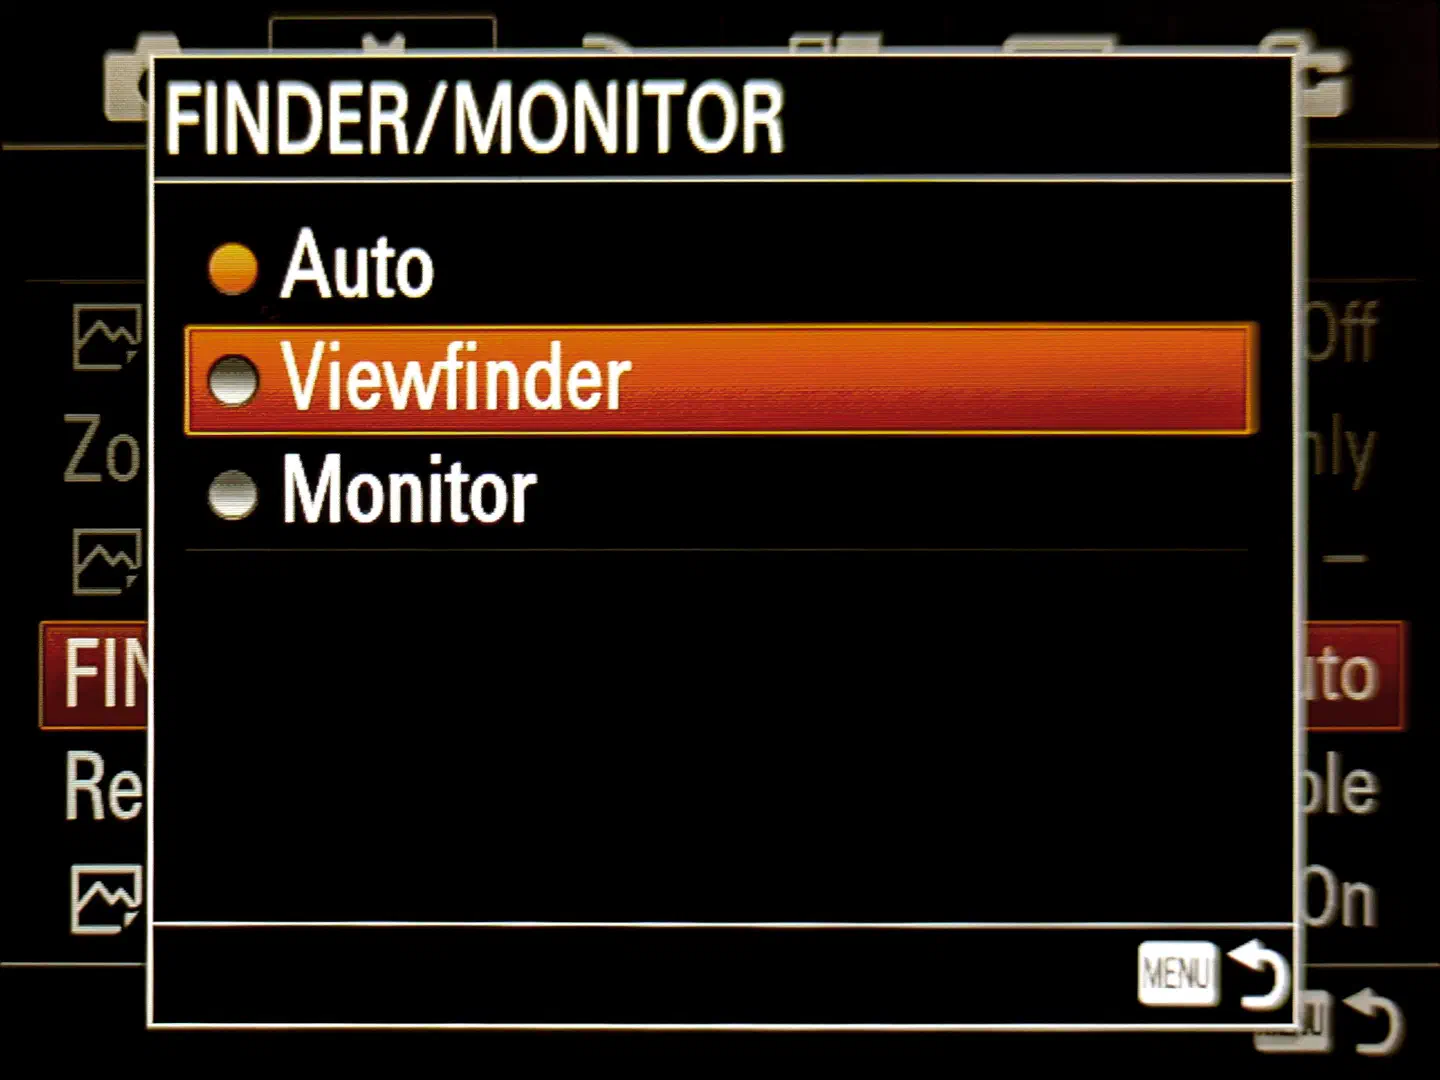
The Sony α7 I has pretty poor battery life. Battery life can be drastically extended by disabling the monitor and using the viewfinder exclusively for shooting and viewing images. Since the viewfinder has a proximity sensor and only turns on when in use, the camera won’t use much charge when it isn’t being used. To disable the monitor, adjust settings as per Fig. 13.
6 Tips for shooting
When using manual lenses, I recommend shooting in Aperture Priority mode most of the time, with ISO set to “Auto”. This allows the camera to automatically determine the appropriate shutter speed and ISO, leaving one to manually adjust only focus and aperture. With these settings, the camera prioritizes keeping ISO low, adjusting the shutter speed accordingly. To prevent motion blur, the exposure time is capped at a minimum of 1/60 second — if greater light sensitivity is required for appropriate exposure, the camera will increase the ISO instead.
When stopping down the lens, focus can be improved by focusing with the lens wide open and then stopping down when the desired focus has been achieved.
The Super TAKUMAR facilitates this with its AUTO/MANUAL switch (the notched plastic switch right at the end of the lens, before the silver adapter ring, on the left of the “AUTO” lettering — see Fig. 14). The switch works in conjunction with a pin on the back of the lens. Some film cameras were able to automatically stop down the lens when the shot was taken by pressing the pin just before the shot. This enabled more accurate focusing with the lens opened up. Because not all film camera models were capable of this feat, the lens provided an AUTO/MANUAL switch to enable stopping down of the lens even when the pin wasn’t pressed. Since the adapters do not press the pin, the AUTO/MANUAL switch effectively serves as an aperture activation switch.
The Canon FD lenses have a similar mechanism, though here the selected aperture is applied by twisting the black ring in the FD to NEX adapter to the LOCK position.
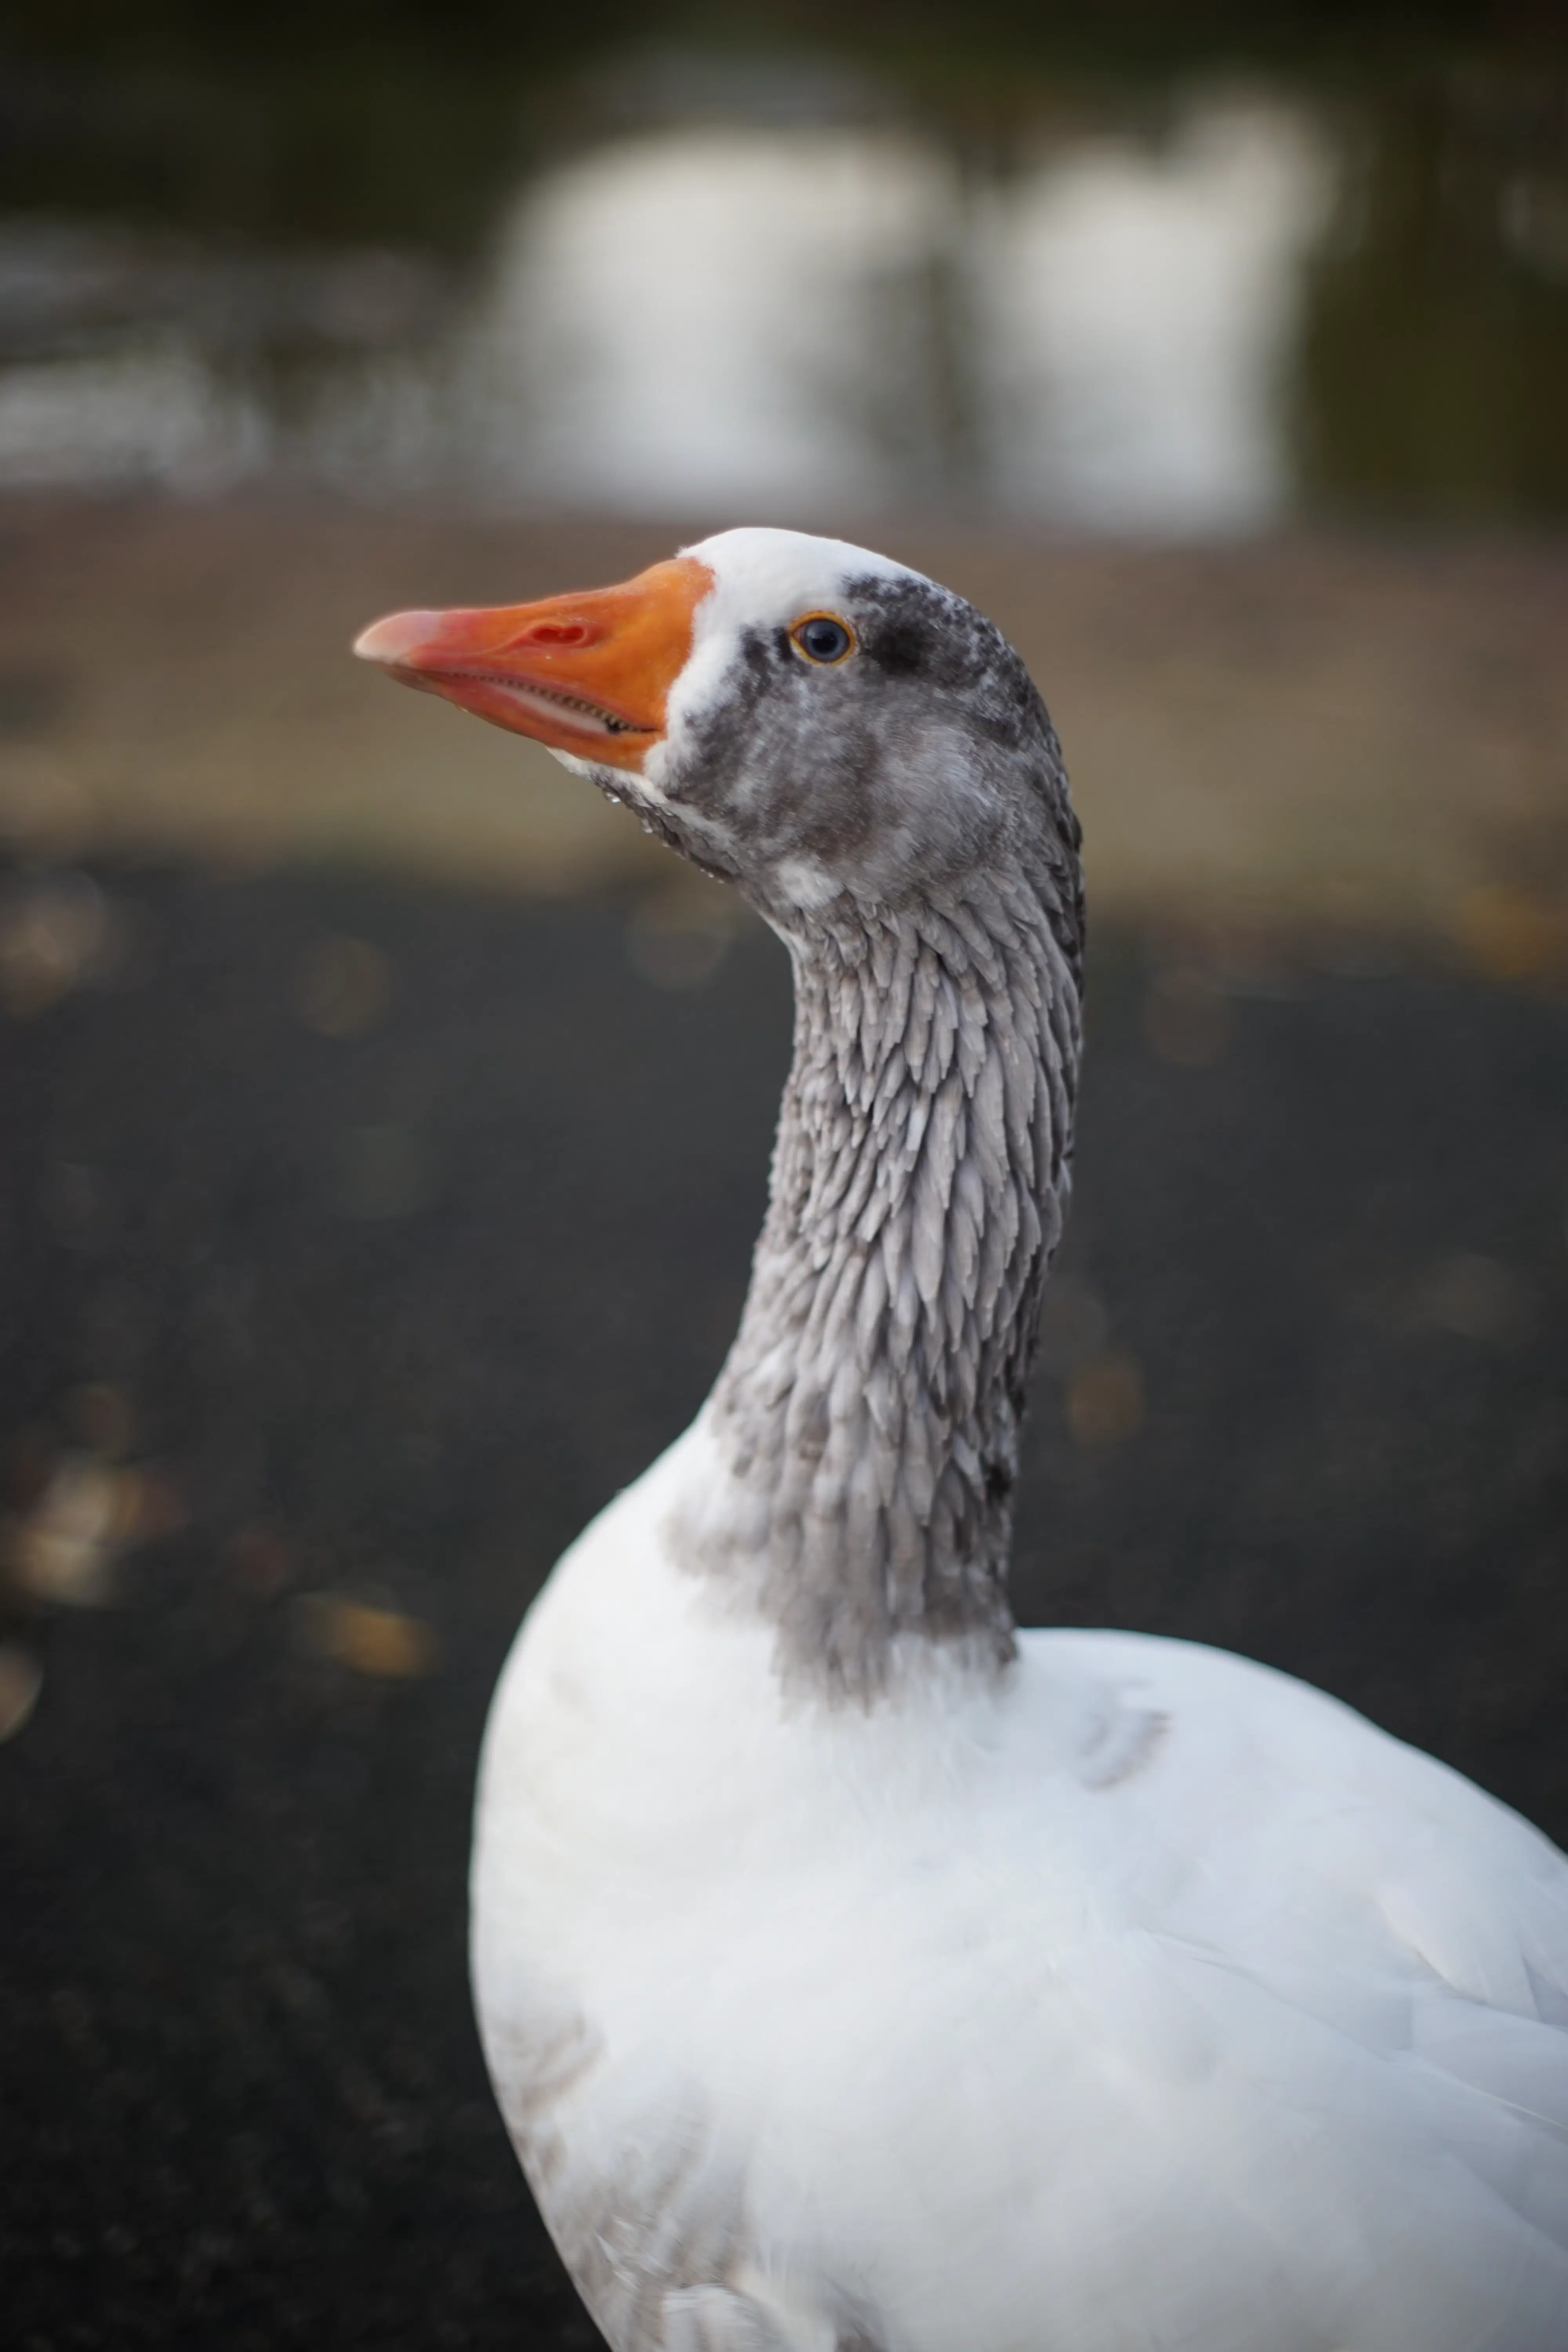
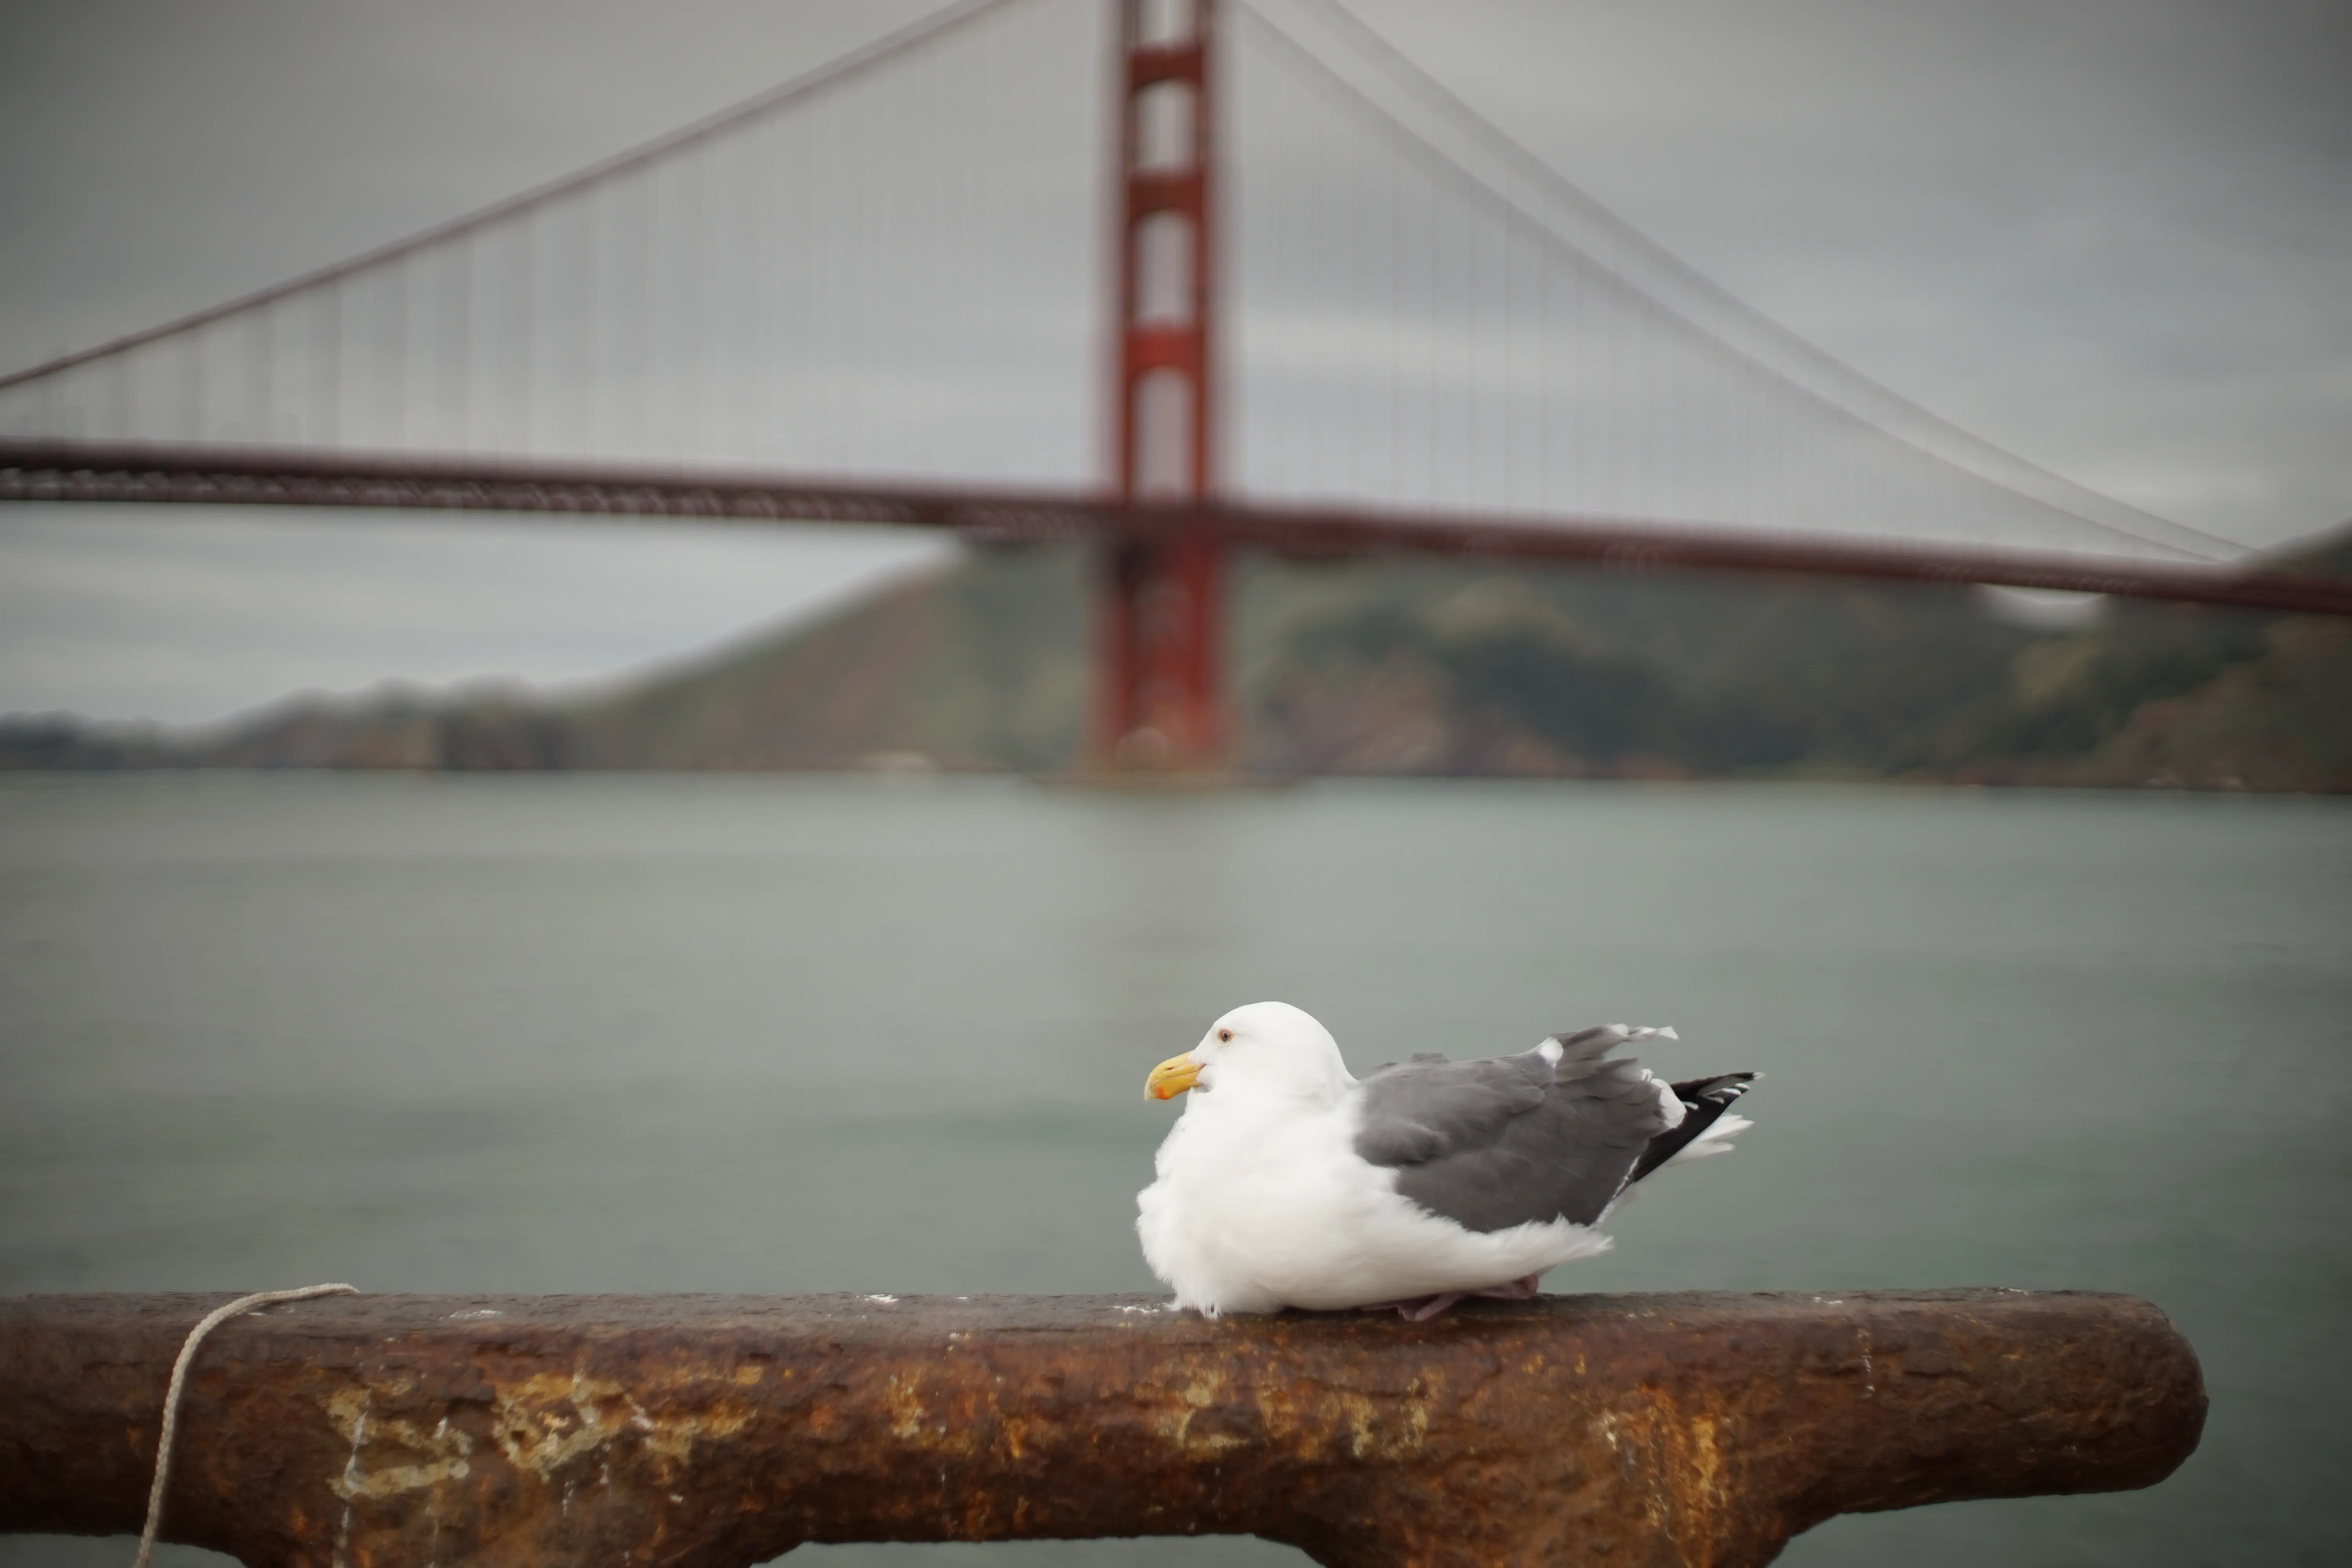
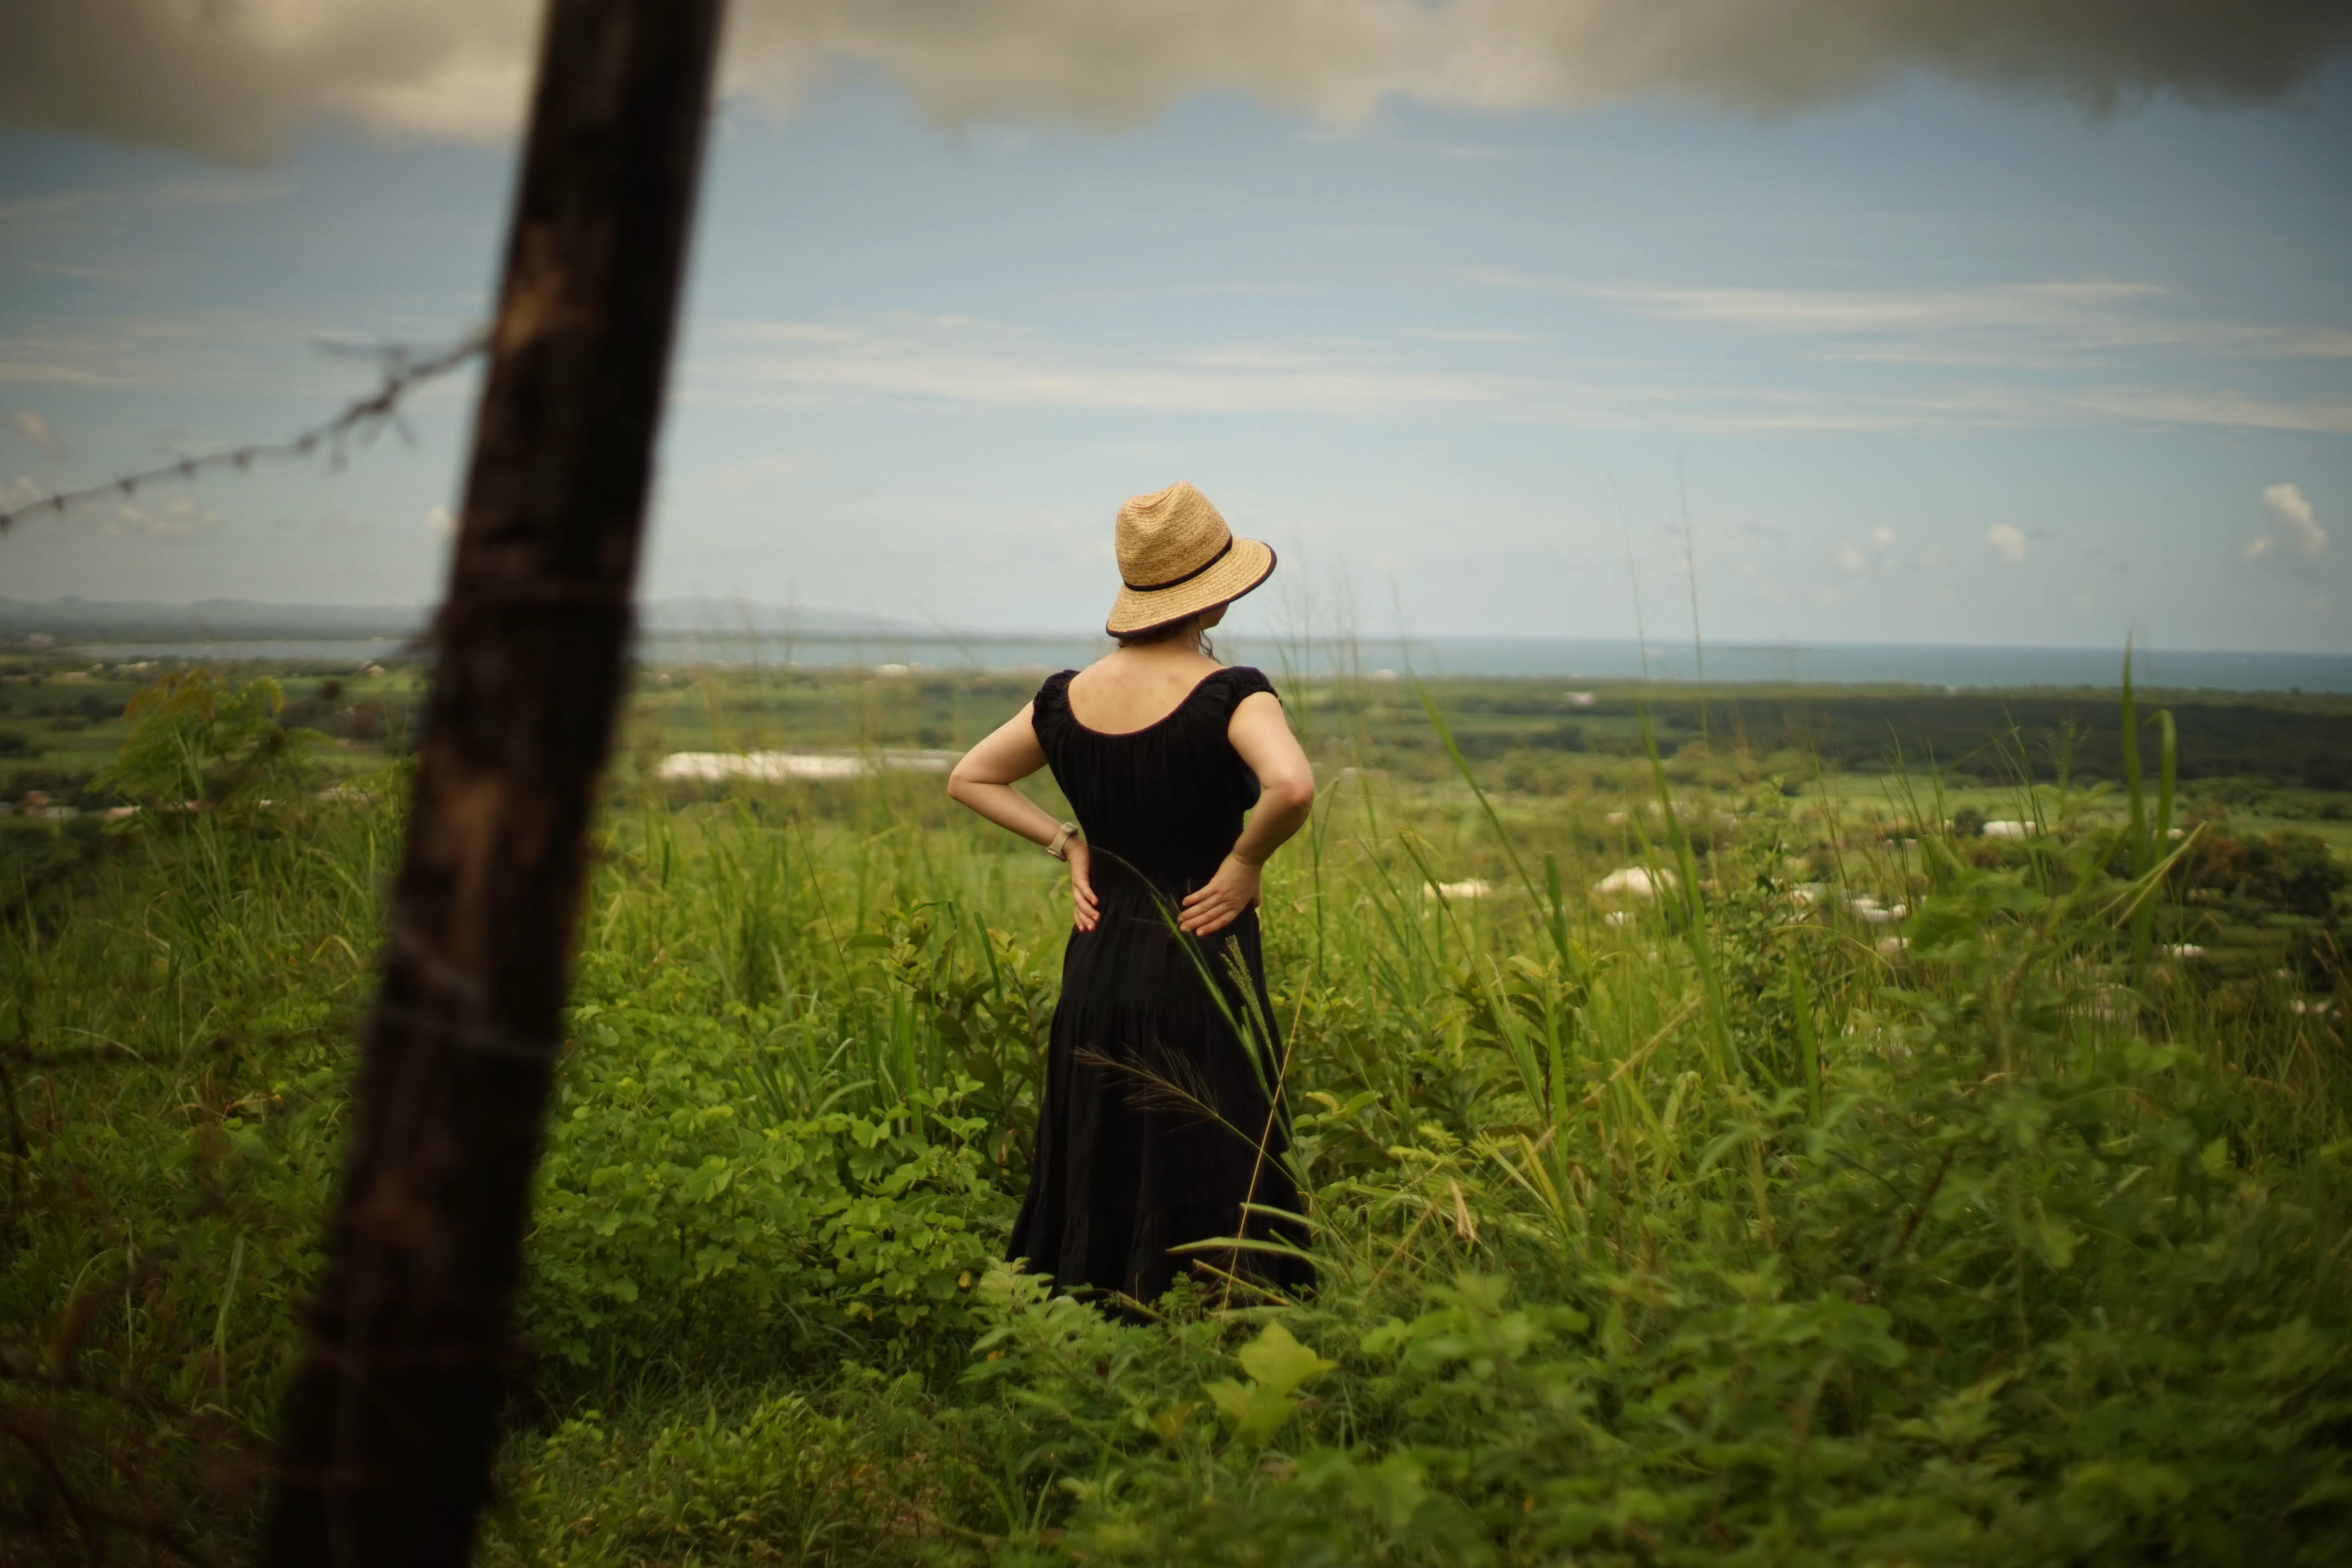
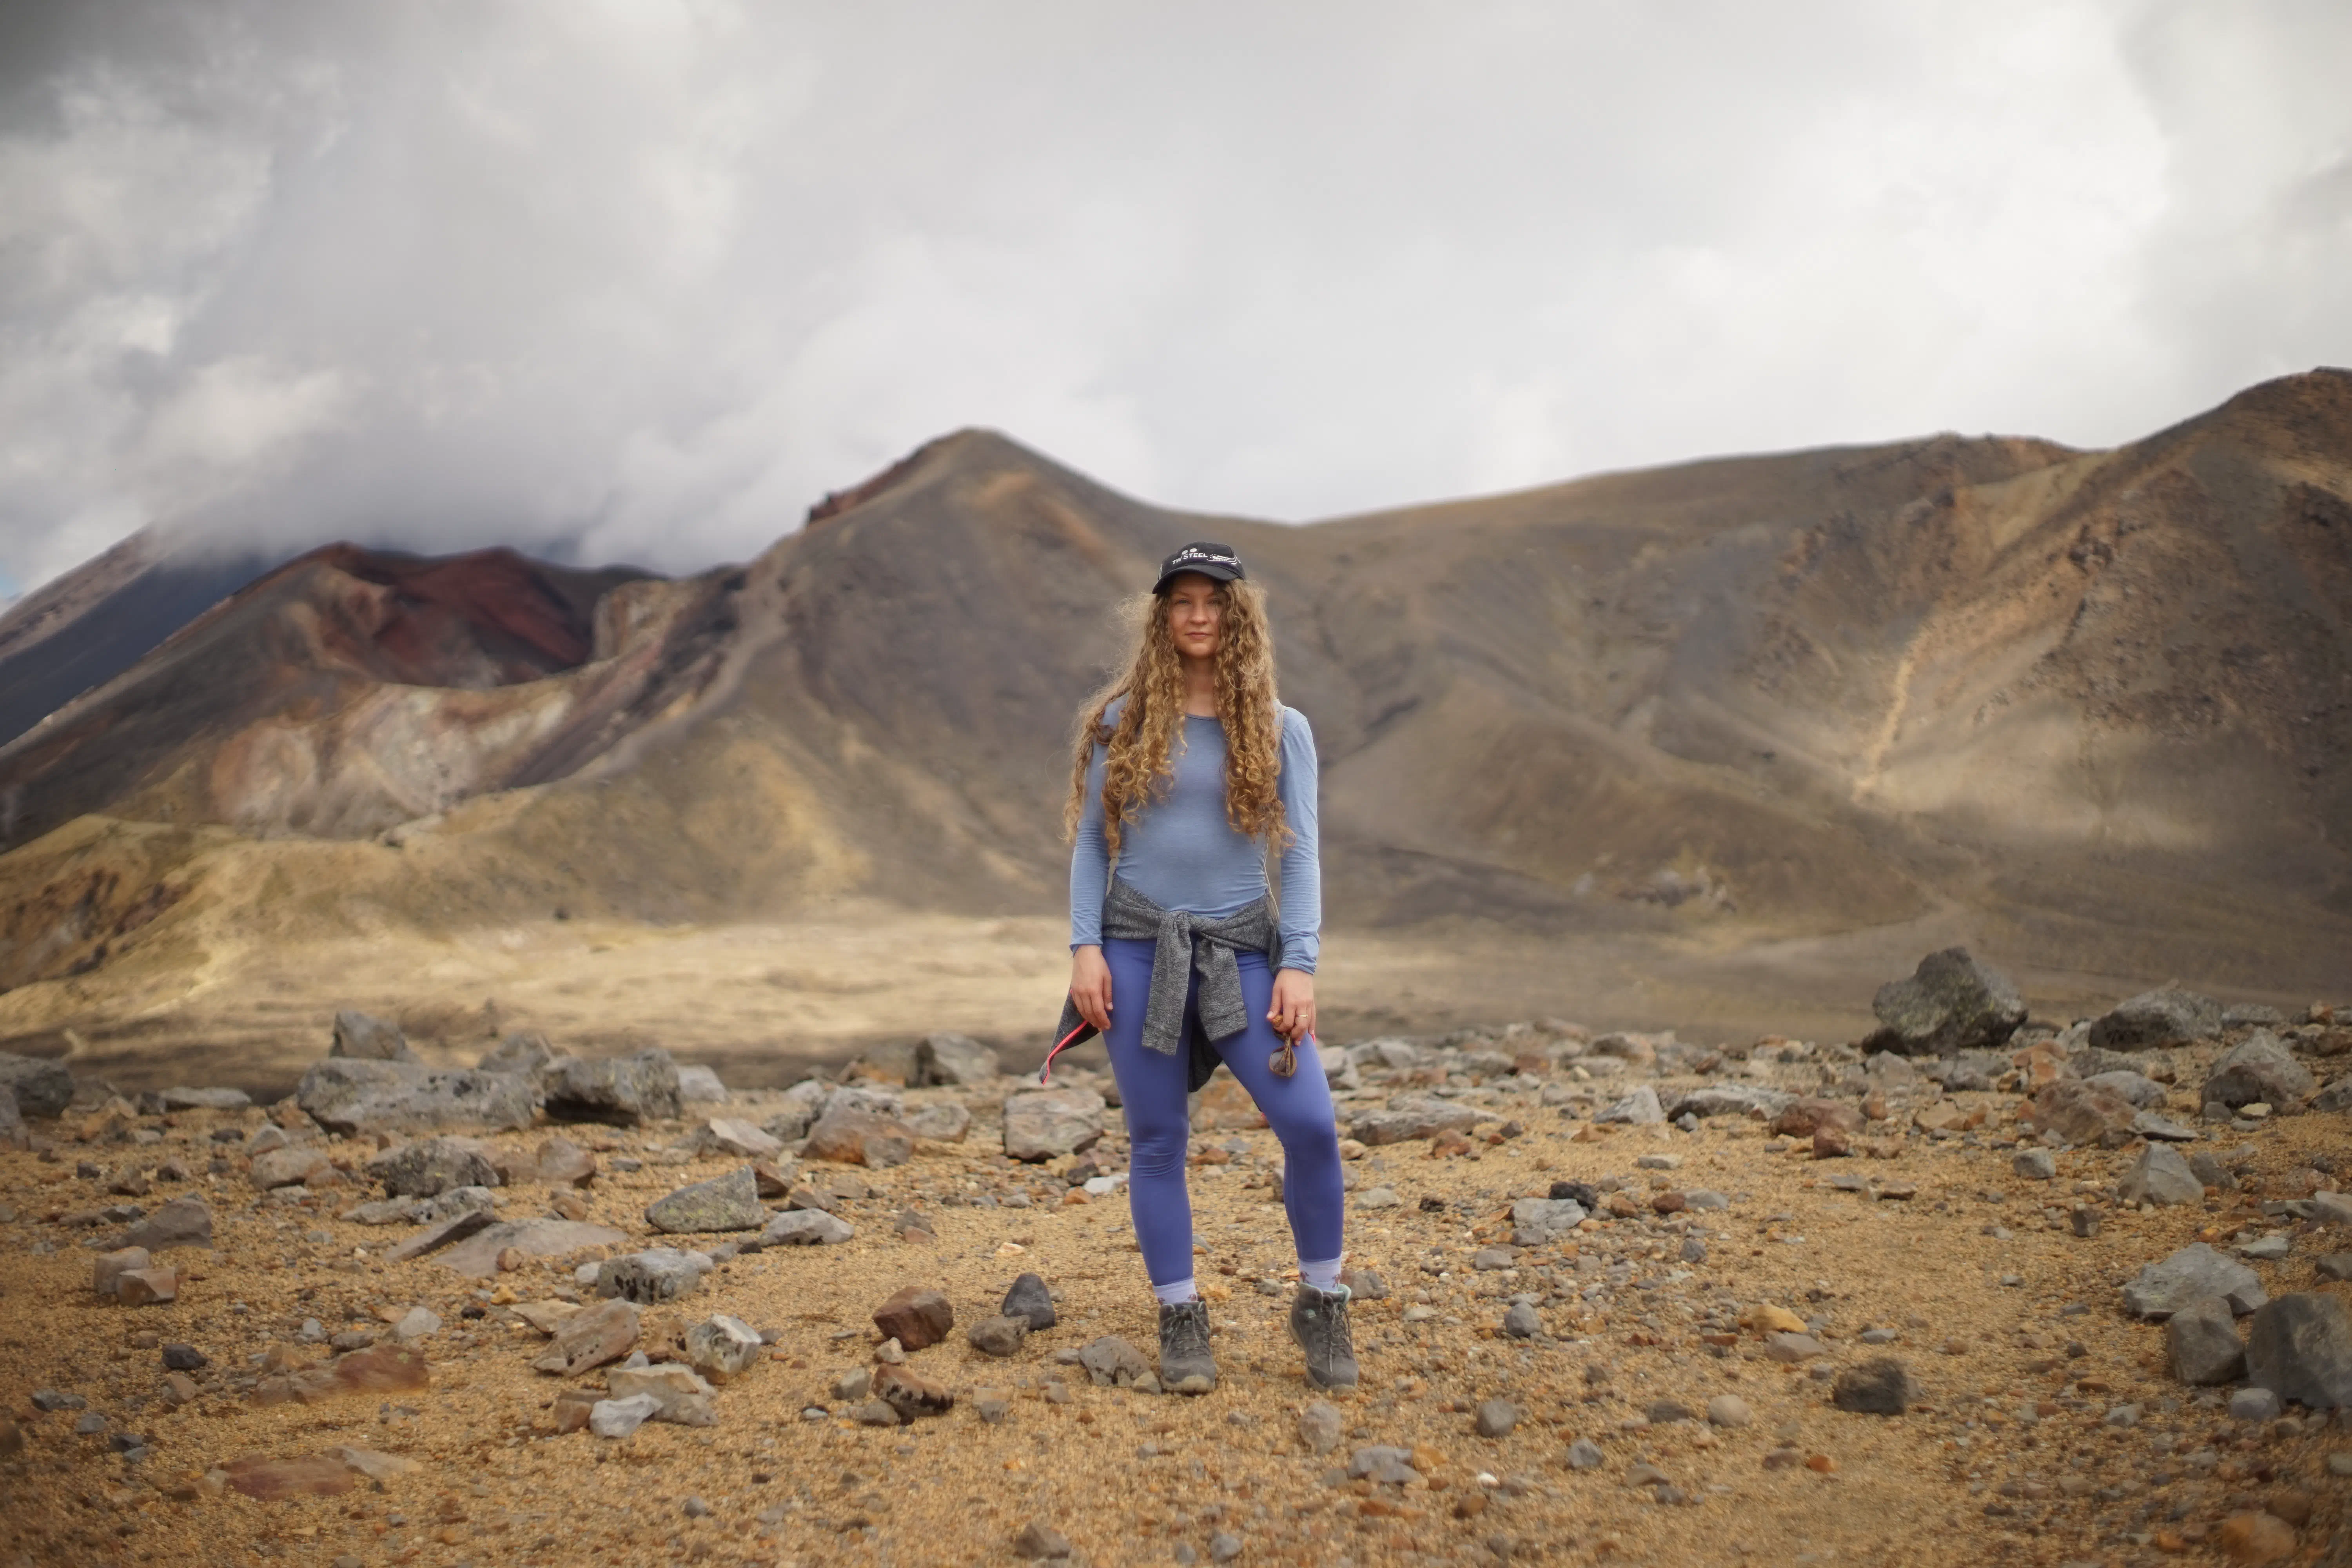
7 Sample images
Some sample images I’ve taken with the Sony α7 I and the Super TAKUMAR can be found below. All of these are completely unedited.


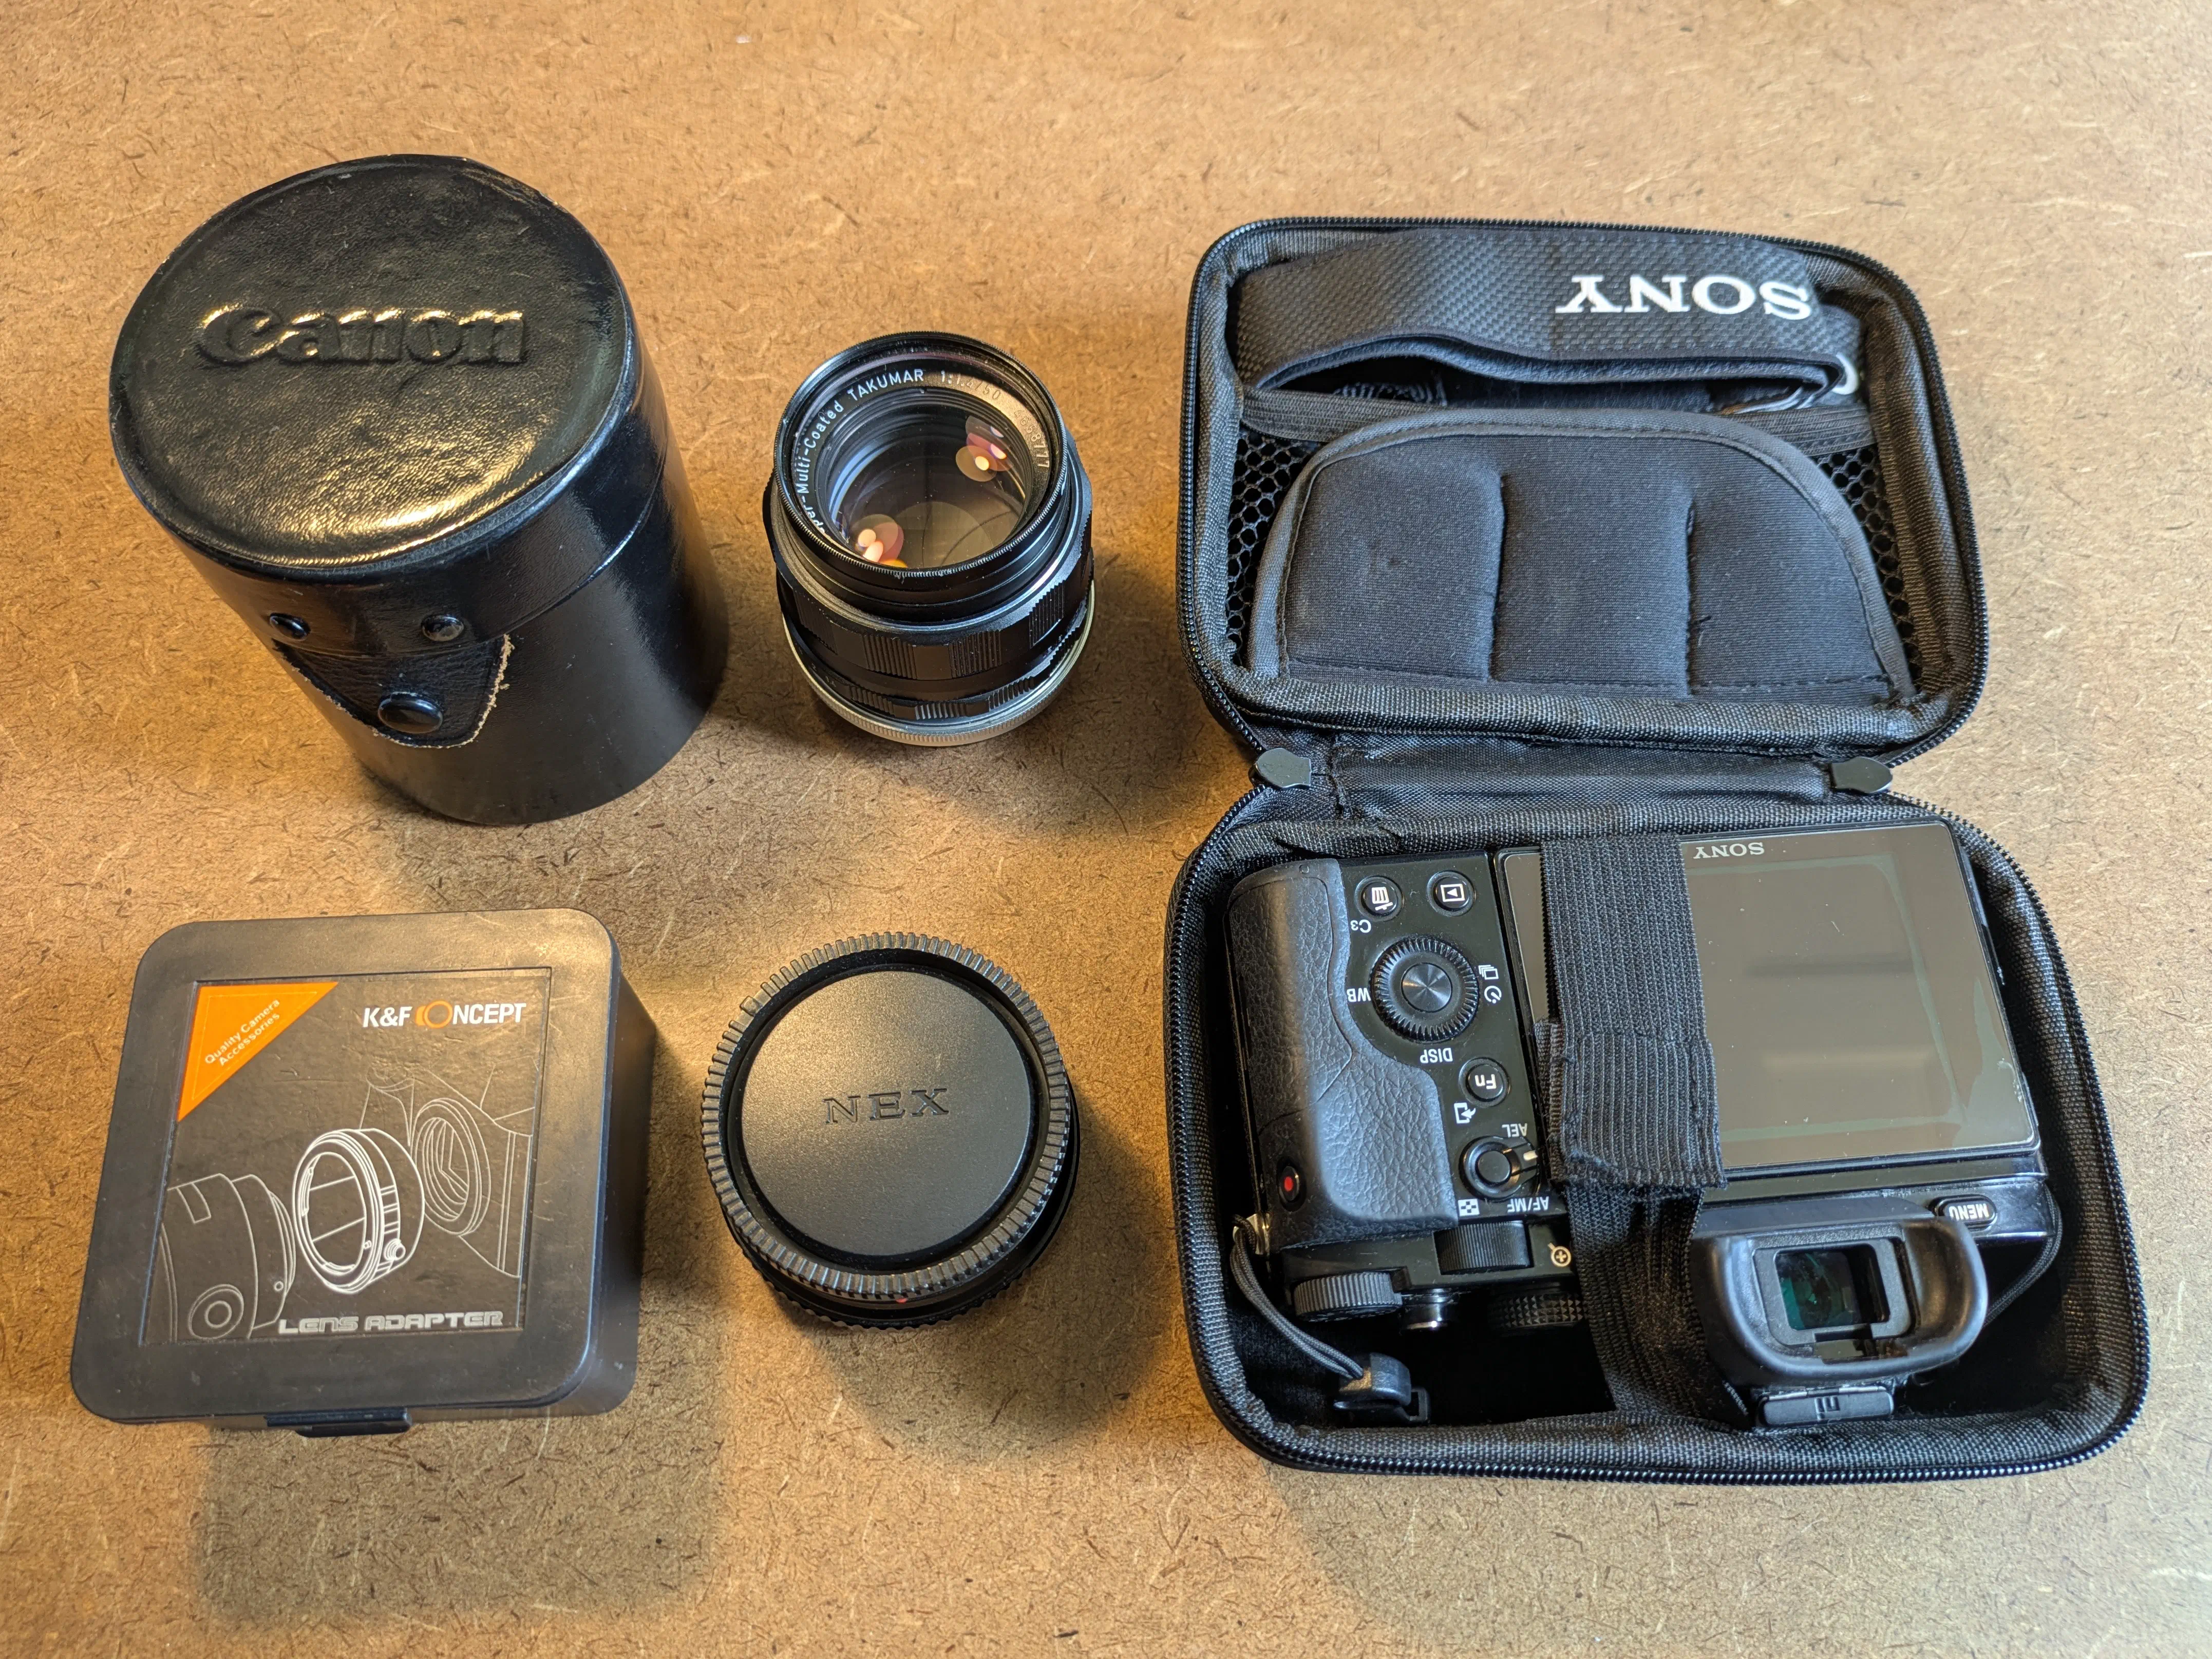
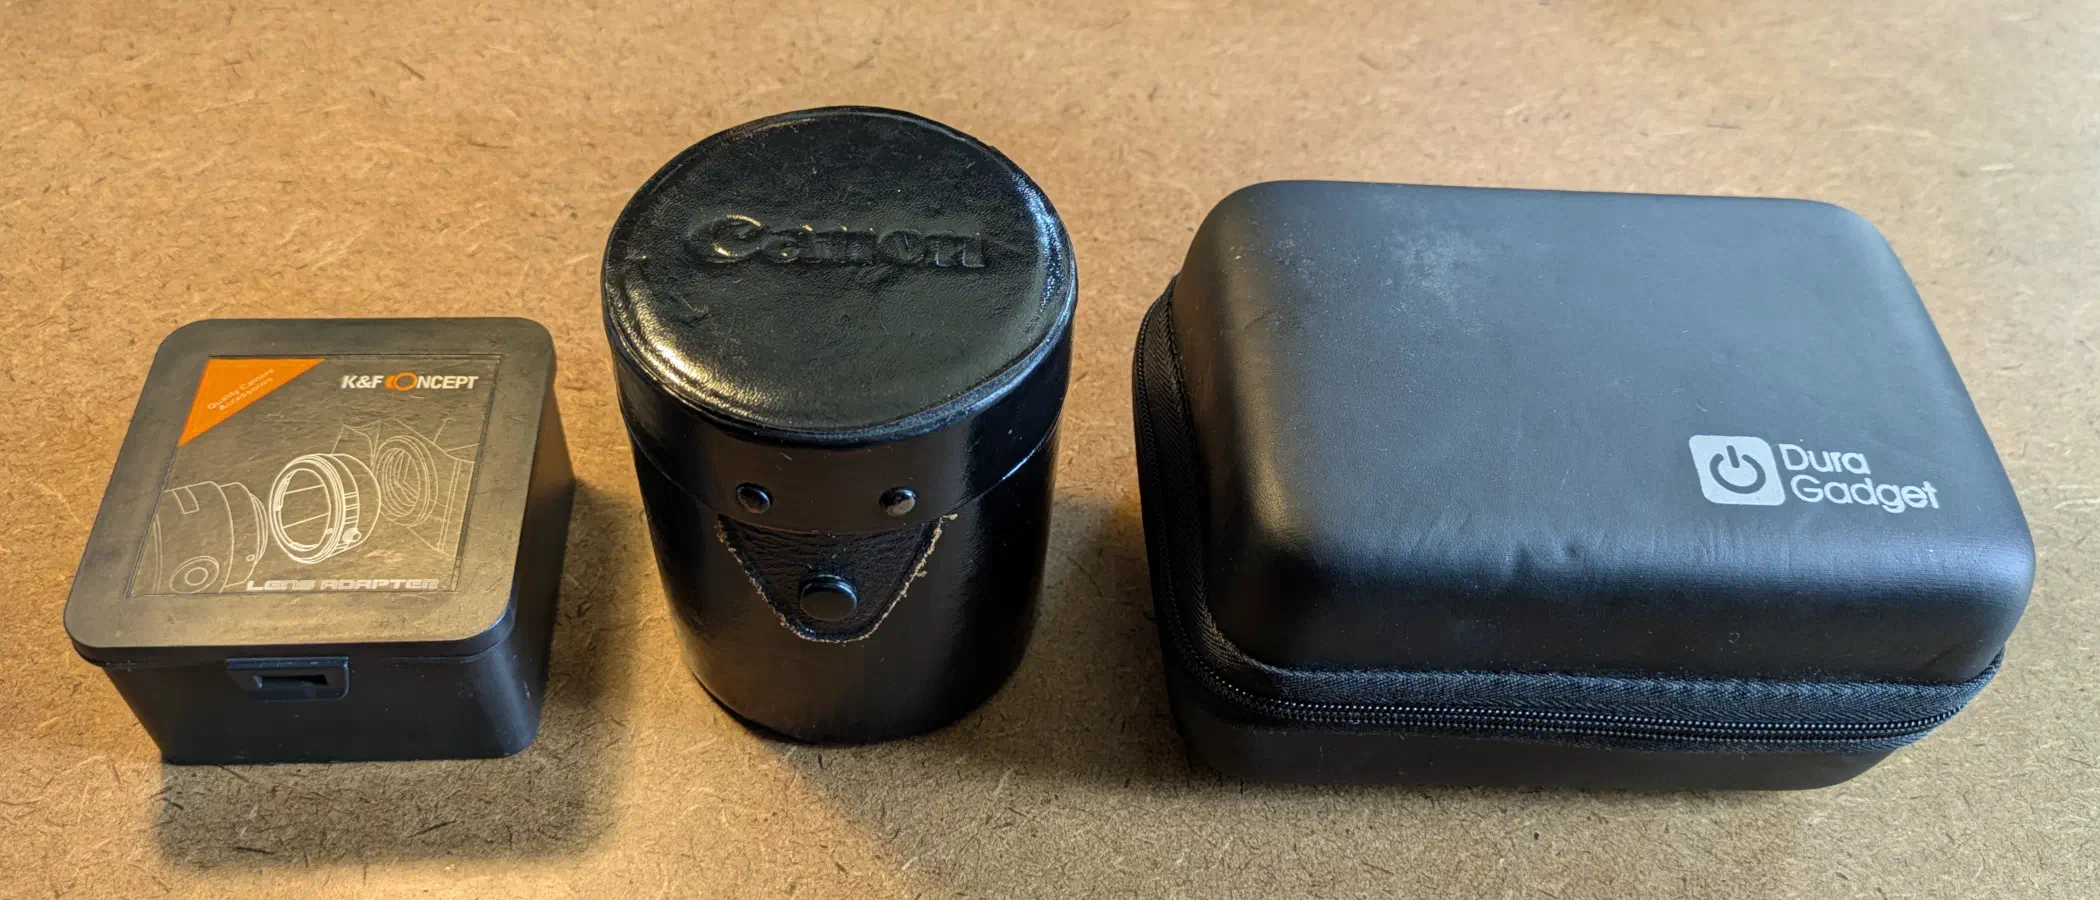
8 Appendix: Travelling with the camera
When disassembled, the camera can be packed rather compactly for travel, as can be seen in Fig. 24. The camera body fits snugly into a Dura Gadget hard shell case, the lens goes into a Canon lens case (with the M42 to FD converter remaining attached), and the FD to NEX adapter goes into its original plastic box.